
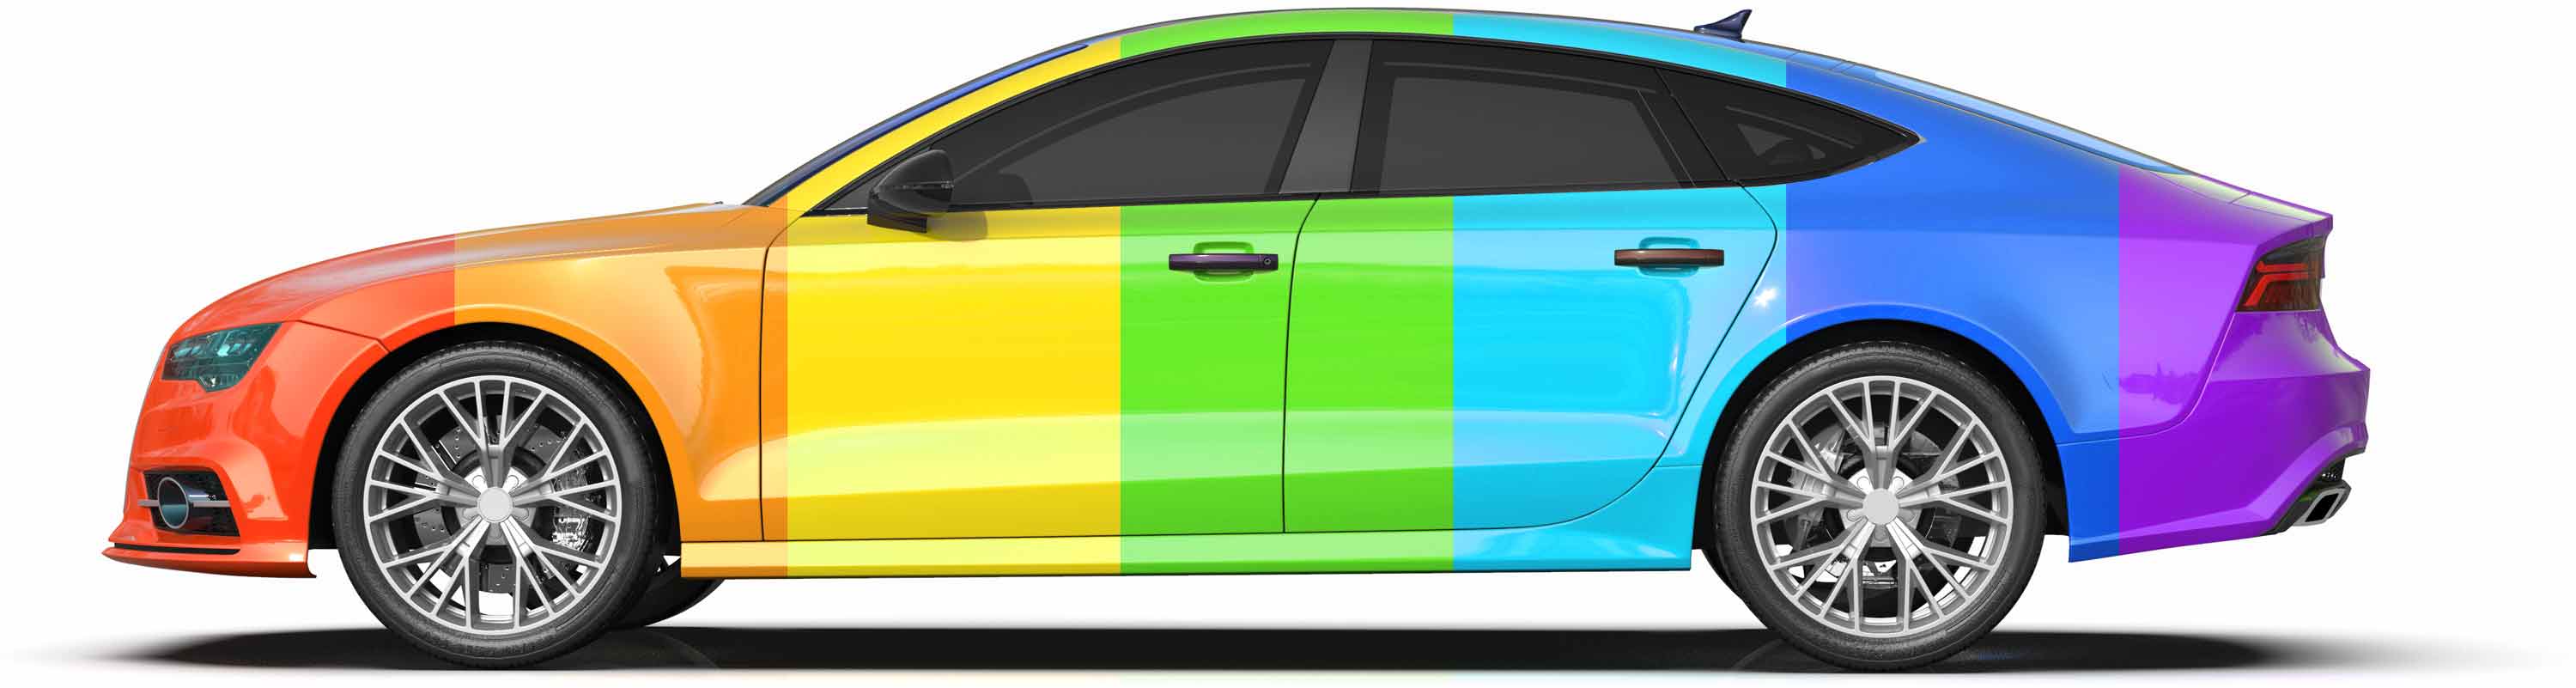
Tips for car wrapping
Preparation & consulting
- Request photos of all sides of the customer vehicles!
- Vehicle drawings – Search and info
- Check logos and image material from customers
- Factor in the costs for dismantling!
- Door handles in drawings
- Equipment packages of the manufacturers
- Decoration sets for emergency vehicles
- Full or partial foiling – arguments
- Avoid expensive mix-ups
Preparing work on the vehicle
Layout & design tips
- Vehicle design with CorelDRAW and Adobe Illustrator
- Develop a concept for the design of company vehicles
- Texts on company vehicles
- Typography - legible & understandable
- Clear colour scheme – less is more!
- Colour suggestions & psychological effect
- Golden ratio
- Design a fleet of vehicles
- Tip: Open spaces for temporary advertising campaigns
- Combining matt and glossy foils
- Advertise with a quality label
Tips for creating print data
Color Management
Special wrapping techniques
- Outgassing of printed car wrapping films
- Wet bonding
- Designing the sheet metal sides of commercial vehicles
- Foil "around corners" (e.g. mudguards/engine bonnet)
- Wrapping e-vehicles – what should I bear in mind?
- Foil rear windows
- Be careful with dark motifs!
- Recommended ambient temperature for foiling
- Sealing the edges of the film
- Cutting stone chip protection films
Films - properties & material knowledge
- Cast/calandered films – differences
- Digital printing/solid colour films – differences
- TPU films - the new generation in car wrapping
- Only use films from the same batch!
- Attachment parts – observe material and surface properties
- Adhesive for vehicle films
- Environmentally friendly vehicle films
- Film colours – selection and care
- Note the colour of the vehicle paint!
- Store films correctly
- Spray films ("car dipping") Advantages and disadvantages
Follow-up & maintenance
Legal notes (StVZO)
Preparation & consulting
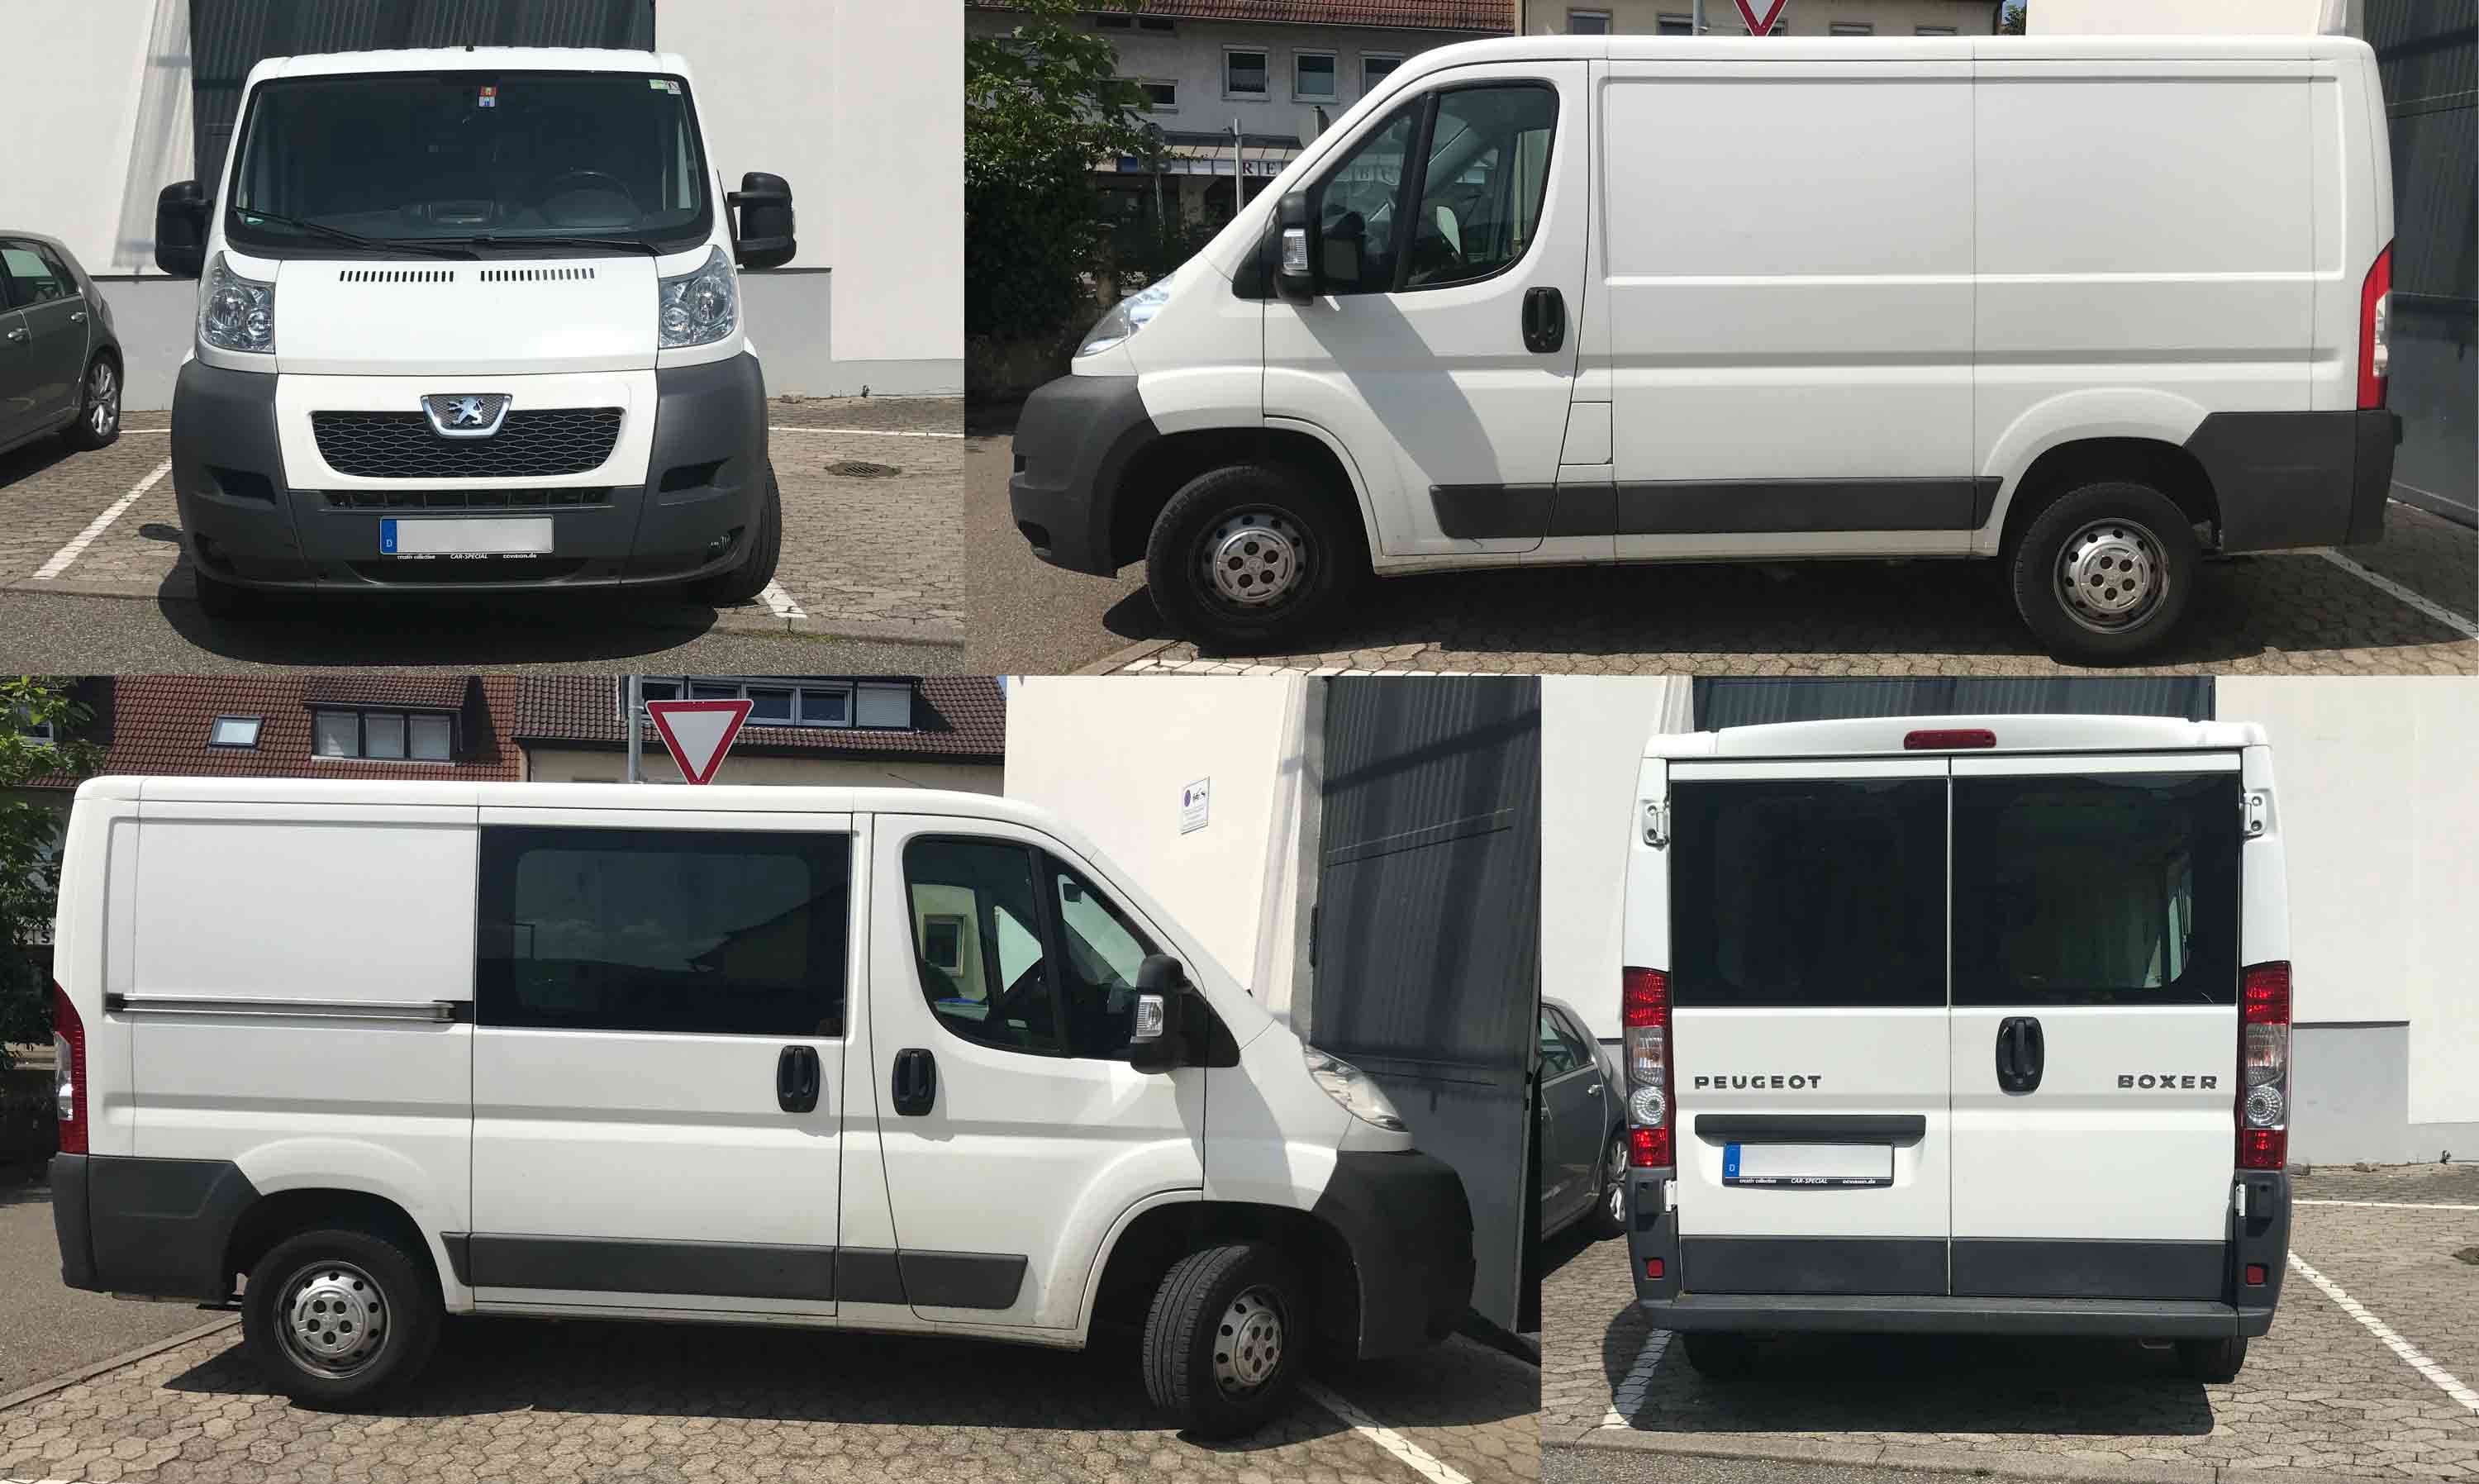
Photos are very helpful if the vehicles to be decaled are not available at the time the order is placed:
- when choosing the right vehicle drawing
- when planning the design
- for assessing the condition of the vehicle
You cannot assume that your customers always know all the relevant details of their vehicles; important information is also often missing from the registration certificates. In addition, photos show possible bodywork damage and rust spots that should be removed before the vehicle is wrapped.
Tip: Always ask for informative photos for each order, ideally also detailed photos of emblems, (modified) add-on parts and damage.
Vehicle drawings – Search and info
Useful information on online searching as well as practical tips on working with the drawings can be found in the help.
Check logos and image material from customers
Unfortunately, it happens all too often: when an order is placed, it is said that logos and images are available. In retrospect, however, it turns out that the logo is just a pixelated bitmap and the photos are mobile phone snapshots. This point should therefore be considered at an early stage so that a final artwork of the logo and/or additional costs for stock photos can be included in the price calculation.
Factor in the costs for dismantling!

Depending on the wrapping and model, numerous vehicle parts must be removed, e.g. front skirt, rear skirt, door handles, mirrors, headlights, rear lights, door panels, bumper protection, emblems, etc: Front skirt, rear skirt, door handles, mirrors, headlights, rear lights, door panels, bumper protection, emblems, etc. There are many imponderables: screws that are difficult to access, adhesive residue is difficult to remove, clips can break, etc. This work can be very time-consuming and would cost several hundred to well over a thousand euros in a workshop. It is therefore important to know exactly which vehicle is involved before calculating the price.
Door handles in drawings
Door handles can be designed in very different ways: recessed or not, recessed handle with sharp edge or not, fully foilable or not depending on material and texture. Therefore, the representation in the drawings is not suitable for an exact contour cut. Always check the exact condition on the original vehicle or, if necessary, on the basis of photos.
Equipment packages of the manufacturers
Vehicle manufacturers often offer their models with a wide variety of equipment and sports packages (e.g. S-Line from Audi, M-Technik from BMW, AMG-Line from Mercedes). Due to the almost unmanageable number of variants and possible combinations, we are unfortunately unable to offer all configurable options. However, as far as possible, we take into account the relevant packages for the most common vehicles.
If the vehicle with the desired equipment package is not available, you can also fall back on the base model, as the bodywork is usually identical. In addition, many equipment packages only relate to the interior and comfort functions.
Decoration sets for emergency vehicles
Many well-known manufacturers offer decal sets ex works for emergency vehicles such as police cars, fire engines or ambulances. If you want to create decal sets yourself based on vehicle drawings, it is imperative to take detailed measurements of the original vehicle to ensure a good fit.
Full or partial foiling – arguments
Arguments in favour of full wrapping
- Ideal advertising space for companies, usually more sustainable and cheaper compared to classic forms of advertising
- More cost-effective than painting
- Spectacular, complex designs can be realised
- Individual special colours: Colours that are rare or very expensive as paint are also possible with films.
- Full wrapping protects the paintwork from scratches and stone chips and thus increases the residual value of the vehicle.
- UV protection: High-quality films offer UV protection that prevents fading and ageing of the paintwork.
- Different paint colours can be concealed with fleet lettering.
- As there is a free choice of paint colour, the vehicle purchase is simplified and the resale value is increased.
- Conceals signs of wear or paint damage (with restrictions)
- Dirt-repellent: High-quality films often have a dirt-repellent coating that keeps the vehicle clean for longer.
- Environmentally friendly: Compared to painting, the installation of vehicle films produces less waste and has less impact on the environment.
- The paintwork is protected from chemicals and environmental influences that can attack it.
Arguments in favour of partial wrapping
- Ideal, very cost-effective advertising space for companies
- More cost-effective than painting or full wrapping
- Shorter installation time: Installation is much faster than with full wrapping, which reduces vehicle downtime.
- If an on-site appointment is not possible, clients can apply simple film designs themselves if necessary.
- Set specific accents: Partial wrapping can be used to create partial design highlights without much effort.
- Seasonal or temporary design: Partial foiling is also suitable for temporary designs, for example for seasonal campaigns.
- Easy to repair: Damaged partial films can be replaced without having to re-wrap the entire vehicle.
You can find numerous examples of full or partial wrapping here.
Avoid expensive mix-ups
If you are wrapping several similar vehicles belonging to the same customer, make a note of the licence plate numbers. This will help you avoid costly subsequent errors such as incorrectly cut films.
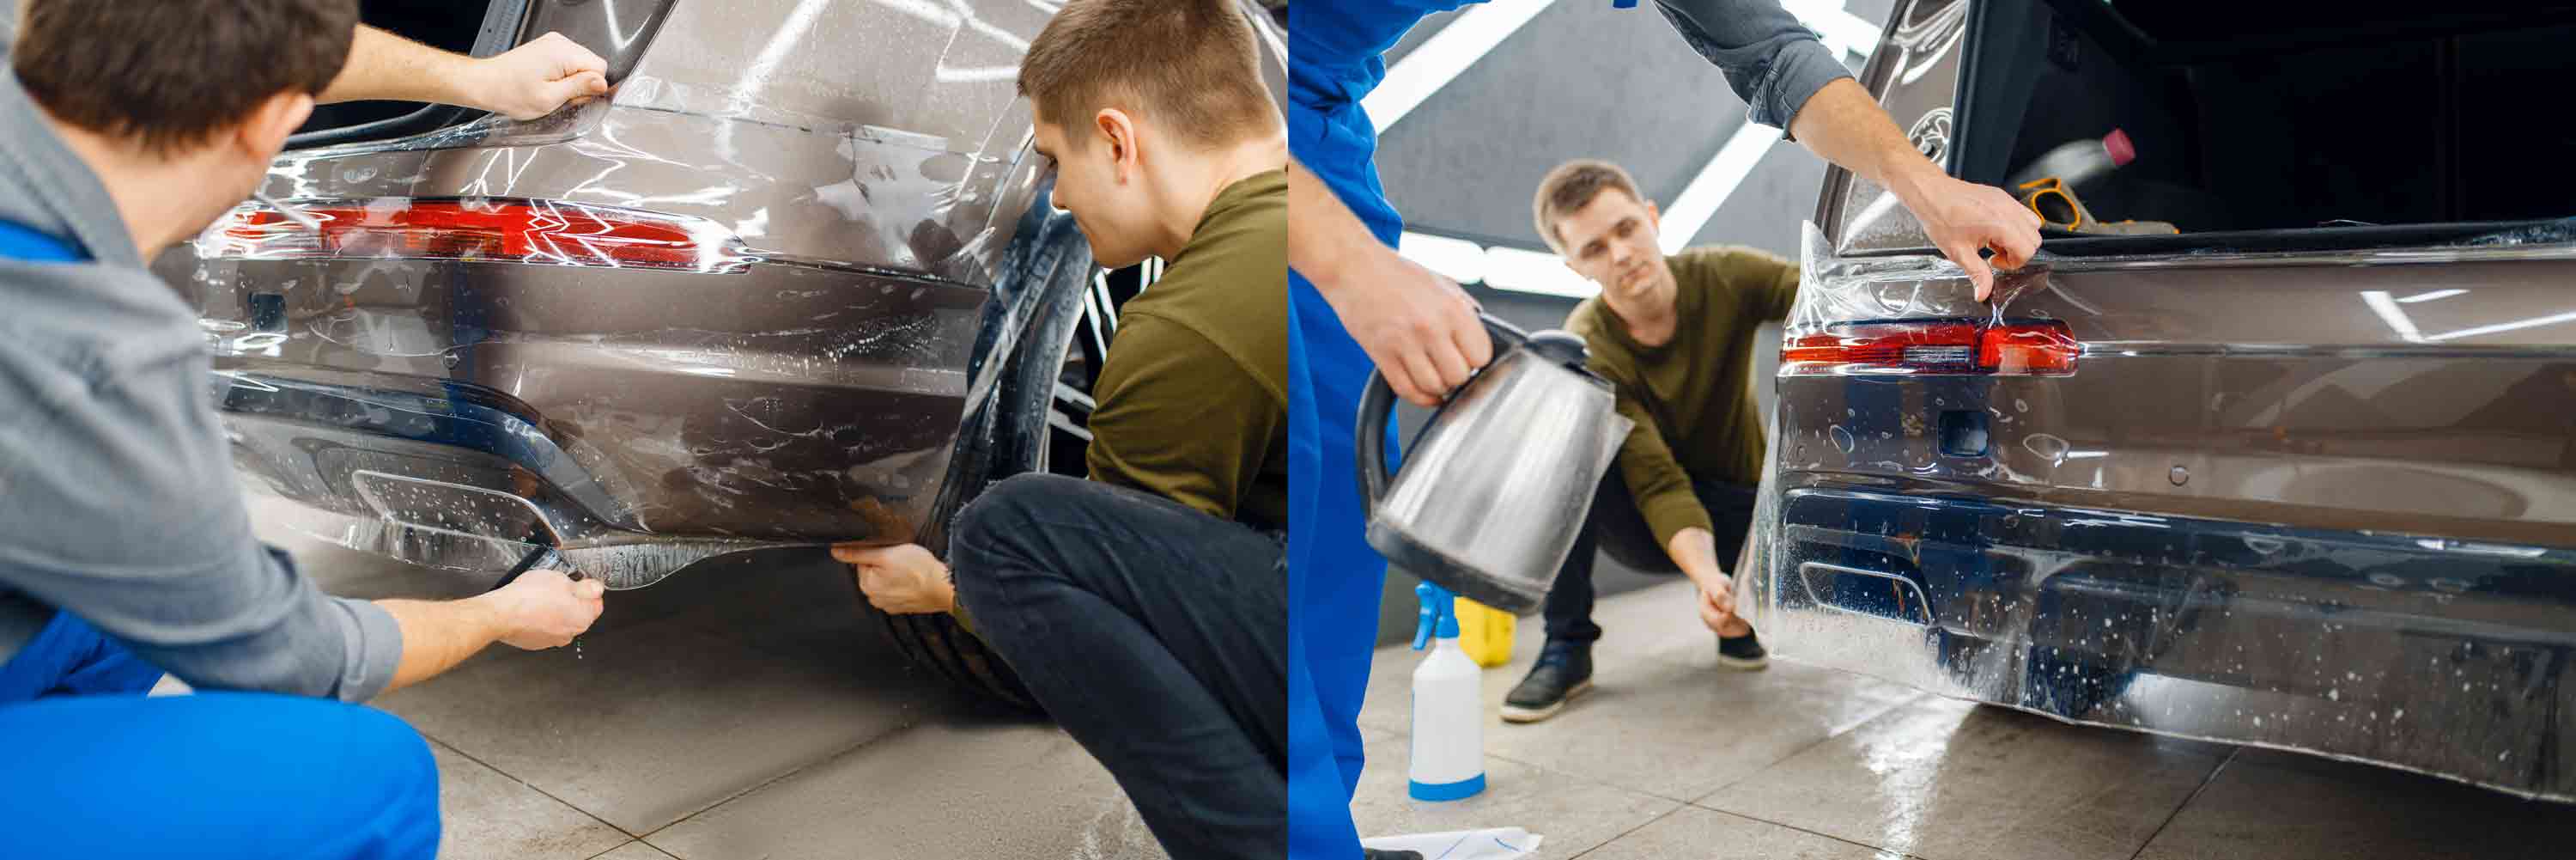
Preparing work on the vehicle
Removal of existing vehicle wrapping
Removal of existing vehicle wrapping
Before preparing a quotation, clarify whether you already have film wrapping. It is also important to know how old the film is and what type of film it is. High-quality 3D films are easier to remove than cheap plotter films. The additional work involved in removing an old film that is already disintegrating should not be underestimated.
Cleaning before wrapping - the right way to do it
A clean, grease-free surface is crucial for good adhesion and bubble-free film application. This is how to prepare:
1. pre-cleaning
Wash the vehicle thoroughly by hand using a pH-neutral cleaning agent. Alternatively, a brush wash without wax or sealant is possible.
2. drying
Dry all surfaces carefully, especially in door rebates, wheel arches and bonnet joints, as moisture and dust often collect there.
3. special cleaner if required
If there are residues of wax, polish or silicone, use a special cleaner for wrapping, as this removes more than isopropanol alone.
4. final cleaning with isopropanol (IPA)
Wipe the dry surface with 70-90% isopropanol. It removes oil and grease, displaces moisture and evaporates without leaving any residue.
5. check compatibility
Test the film in advance on an inconspicuous area for adhesion and material compatibility.
Professional tip
Clean first with a special cleaner and then with isopropanol. Use a clean, lint-free cloth so as not to cause any new soiling. This guarantees that the surface is residue-free and adhesion-optimised.
Note attachments - free checklist
There is a wide range of possible add-on parts such as emblems, trim strips, bumper protection, etc. The same model can be configured differently depending on customer requirements. It may also be necessary to paint plastic parts in order to be able to wrap them. Failure to take this into account during the planning stage can lead to unpleasant surprises later on. To avoid this, you can  download a practical checklist here.
Tuning parts – has the vehicle been modified?
There are many possibilities: Spoiler, front lip, rear lip, sill mouldings, skirts etc. These add-on parts can be glued, screwed or both, and can cause problems during removal. It may also be necessary to paint an add-on part so that the film adheres to it. It is therefore always advisable to inspect the vehicle beforehand.
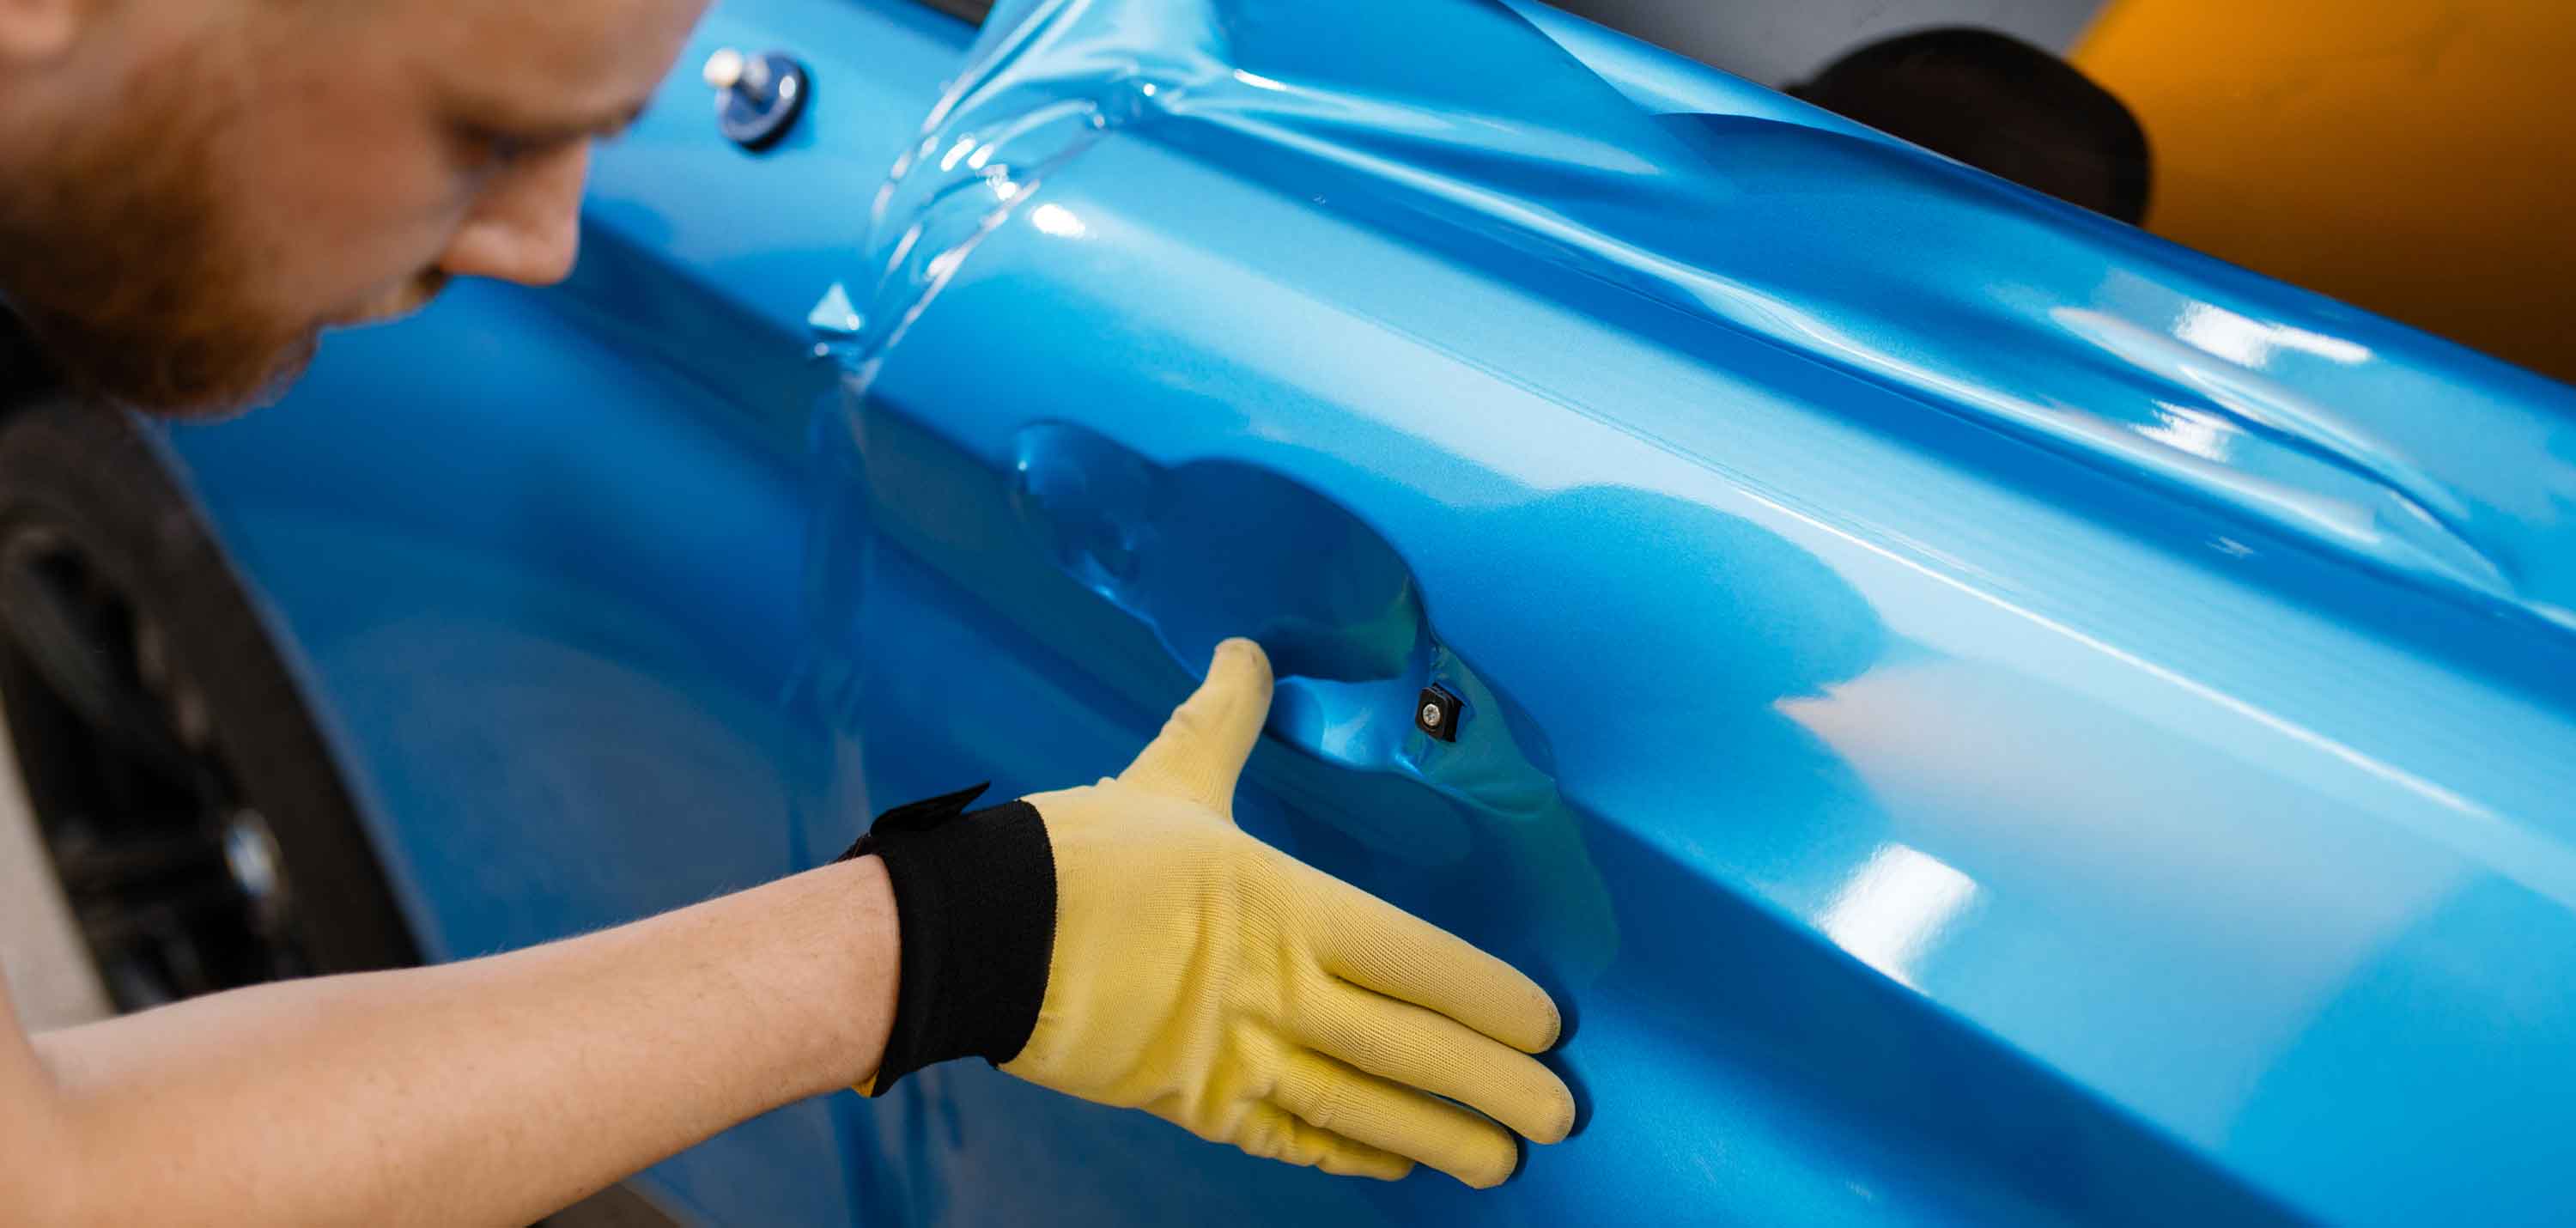
Previous damage to the vehicle?
Routinely check the paintwork of the customer's vehicle for scratches and other damage before wrapping. Take photos of these and inform your customer to prevent any disputes.
Note: Wrapping cannot hide paint damage such as scratches or stone chips. Any tangible damage will remain visible even after wrapping. In the worst case, weakened areas of paintwork caused by previous damage could be removed when the film is removed.
Important: Measure first, then plot!
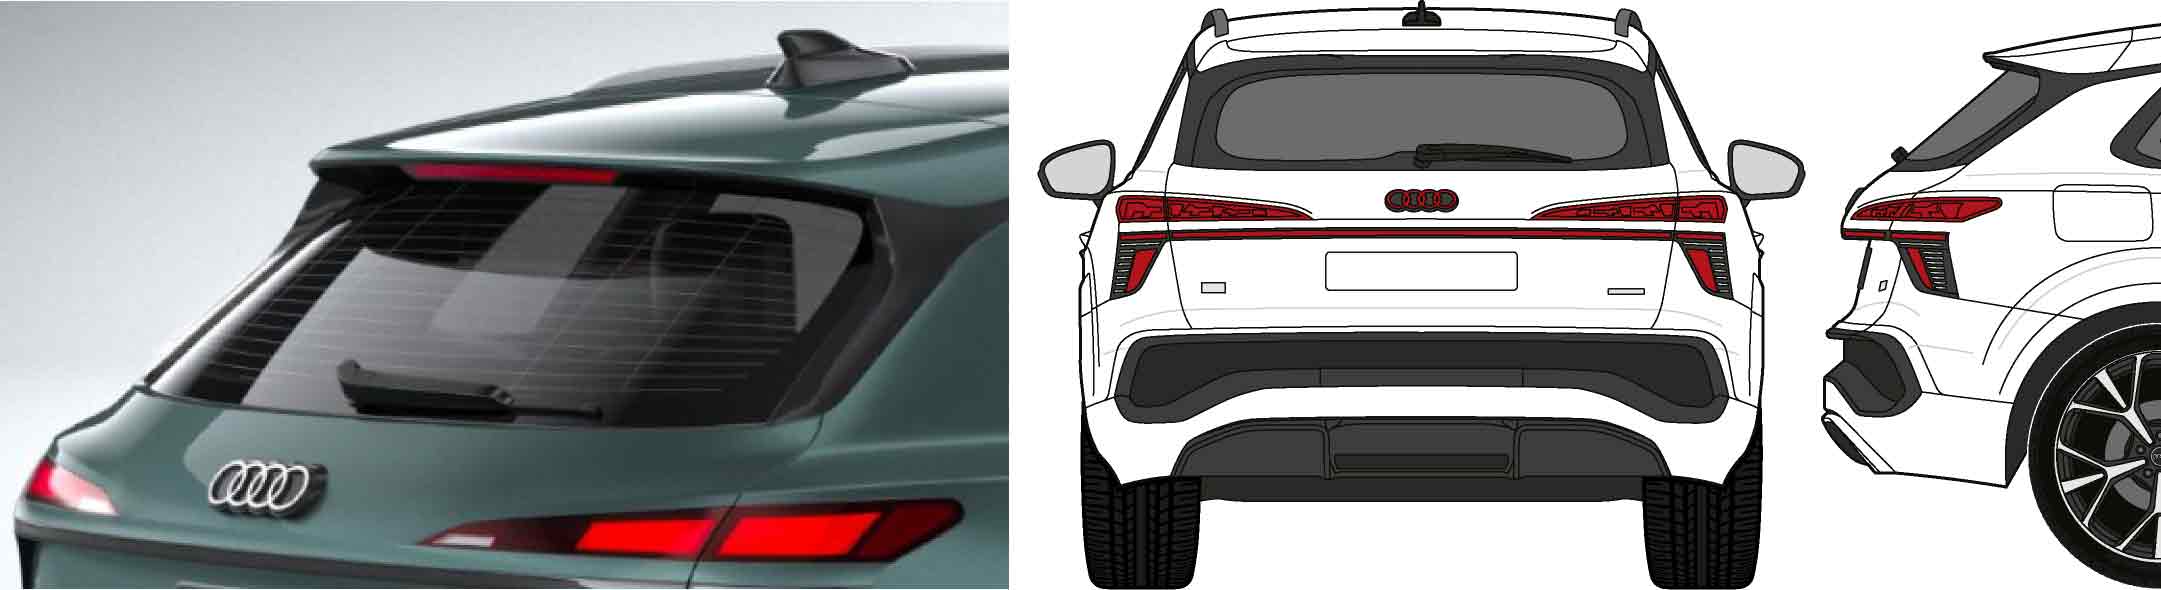
Due to the curvature, the height and width of the rear window can only be determined directly on the vehicle using a flexible measuring tape.
In two-dimensional drawings, curved panes, curves and beads can only be depicted inadequately. Slanted panes and surfaces are shortened in perspective, and corner radii may also deviate. The paths and dimensions of the drawings must therefore not be used for the film cut without first checking them on the original vehicle. creativ collection® accepts no liability for dimensional deviations.
Layout & design tips
Vehicle design with CorelDRAW and Adobe Illustrator
Vehicle design with CorelDRAW and Adobe Illustrator
In the help you will find step-by-step instructions for working with vehicle drawings.
Develop a concept for the design of company vehicles
Before designing, it should be clear what the vehicle design should achieve.
Questions in advance:
- What is the goal? (e.g. highlighting special services, increasing brand awareness, image building, emphasising regionality, etc.)
- Who is the target group? (young or old, modern or traditional)
- Where is the vehicle travelling? (city, country, motorway - important because of the local or long-distance effect of the vehicle design)
- Is there an existing corporate design?
- Which competitors are there and how can you differentiate yourself from them?
- Which vehicles are to be designed and what is the budget?
The possibilities for designing a vehicle are endless. You should first define a clear objective in a detailed discussion with the customer. Tip: Design examples help inexperienced customers in particular to form an opinion.
Examples of design & effect:
| Customer | Image | Design | text |
| Start-up | young, modern, innovative | striking, eye-catching, bold colours | striking slogan |
| Local craftsman | reliable, down-to-earth | clear structure, easy to read | Keywords: quality, regionality, reliability, tradition |
| Law firm/finance | serious, discreet | simple, reduced, little colour | factual and clear |
Good preparation is the basis for successful vehicle wrapping. With a target-group-orientated overall concept including a coherent text and design language, you will impress your customers.
Texts on company vehicles
As company vehicles are mobile advertising spaces, the information on them must be easy to grasp. You should therefore formulate it briefly, clearly and memorably.
Set priorities:
- Who? Company name
- What? service or product
- Where (if regionality is important)
- Why? What's in it for the customer?
Avoid:
- Meaningless general phrases such as "... and more" or "The slightly different ..."
- Technical jargon - potential new customers could be put off
- Only company name without information = wasted potential
Example:
CARPENTRY SAMPLE NAME (Letter height 24 cm)
Custom wooden furniture & bespoke interior fittings (Letter height 12 cm)
carpentry-sample-name.co.uk (Letter height 12 mm)
Quality from tradition in Example City since 1975 (Designed as quality seal)
Further details and postal address in 6 cm letter height
Tip:
Very few orders will be placed as a direct result of a brief inspection of company cars. A realistic goal is therefore to arouse interest with clear text messages and lead potential customers to the website (or social media account, if applicable), where they will find detailed and convincing information.
Generate attention → Arouse interest → Enable contact
Typography - legible & understandable
Consciously plan the texts on company vehicles with regard to their near and far effect. The most important information should be recognisable at first glance.
Important for travelling:
- Large & easy to read from a distance: company name + website or slogan (industry, type of service and customer benefits should be quickly recognisable)
- Small & optional: Postal address, services (only legible when the vehicle is stationary)
- Test: Can you memorise the most important information (company, industry, customer benefits, contact address) in 2-3 seconds?
Font design:
- Fonts: Clear, sans serif fonts such as Arial, Lato, Open Sans
- Optional decorative fonts or handwritten fonts for slogans
- Clearly graduated sizes: e.g. 24 cm (logo), 12 cm (slogan), 6 cm (details)
- Maximum of two fonts, e.g. sans serif font + handwritten font for slogan
Good legibility:
- High contrasts: light text on a dark background or vice versa
- Leave space, do not squeeze text into corners
- Use fonts with a thicker line width for background motifs
Avoid:
- A wild mix of different fonts
- Many different font styles and line spacing
- Combine similar fonts, e.g. Arial and Helvetica
- Texts on uneven backgrounds
- Narrow fonts ("condensed") or sentences in capital letters, which are difficult to read
- Decorative fonts that are difficult to read
- Character and line spacing that is too narrow
Playful details are distracting. Clear typography, on the other hand, makes texts appear more credible and serious.
Clear colour scheme – less is more!
When designing company vehicles, you should opt for a clear colour scheme. For example, you can choose a muted base colour for the large areas - this can also be the paint colour - and one or two accent colours. If the main colour is already very striking, you can also keep texts and logos in black and white. In this way, you can achieve a uniform appearance, especially for fleet labelling, even if different vehicle types are used for which texts, logos and images need to be positioned differently.
Advantages of a clear colour scheme:
- Easier design and coordination
- High brand recognition value
- More economical: quantity discount possible when purchasing film
Discover inspiring vehicle designs with effective colour combinations here.
Our tip: Also present two roughly laid-out advertising materials that match the vehicle design. This will give your customers a well-rounded overall impression and increase the chance of follow-up orders.
Colour suggestions & psychological effect
If you would like to make targeted use of the psychological effect of colours, you will find an overview for inspiration in the following list:
Colour |
Typical effect |
| cool, serious, trustworthy, reassuring, technical | |
| energetic, striking, passionate, powerful, alarming | |
| natural, harmonious, healthy, calming, sustainable | |
| friendly, attention-grabbing, optimistic, full of energy | |
| lively, creative, warm, stimulating, playful | |
| luxurious, mysterious, creative, spiritual, unconventional | |
| noble, strong, authoritarian, modern, elegant | |
| clean, pure, neutral, minimalist, clear | |
| matter-of-fact, sober, professional, reserved, serious | |
| down-to-earth, warm, reliable, natural, traditional | |
| fresh, modern, invigorating, creative, likeable | |
| soft, feminine, sensitive, calming, elegant | |
| high-quality, luxurious, exclusive, warm, valuable | |
| modern, technological, high-quality, neutral, discreet |
The following colour suggestions serve as suggestions and are based on the typical associations of the respective industries:
Professional group |
Colour suggestion |
Psychological effect |
| Driving schools | Red, blue, white | Attention, safety, clarity |
| Finance & counselling | Dark blue, grey, anthracite | Seriousness, expertise, stability |
| Catering & food trucks | Red, green, orange | Appetising, lively, natural |
| Craft & construction | Red, orange, yellow | Signalling effect, energy, attention |
| IT & technology service providers | Blue, grey, turquoise | Tech-savvy, reliable, modern |
| Creative industries & media | Purple, turquoise, strong colours | Individuality, innovation, originality |
| Agriculture & nature | Green, brown, earthy colours | Naturalness, down-to-earth, environmental awareness |
| Fashion & Beauty | Black, rosé, gold | Elegance, sense of style, luxury |
| Public facilities | Blue, white, green | Neutrality, proximity to the public, environmental awareness |
| Care & health | Blue, white, light green | Trust, cleanliness, calm |
| Cleaning & hygiene | White, light blue, turquoise | Purity, freshness, cleanliness |
| Security services | Black, dark blue | Authority, seriousness, presence |
| Animal care & veterinary medicine | Green, brown, light blue | Close to nature, caring, calm |
| Transport & logistics | Blue, silver, dark red | Reliability, safety, professionalism |
| Event service | Purple, black, silver | Creativity, event character, professionalism |
Combine colours consciously to achieve an individual and unmistakable appearance. Targeted colour breaks or unusual combinations can also attract attention and increase recognition value. Ultimately, the choice of colour should always be tailored to the desired image, the target group and the intended use.
Golden ratio

On the left is the picture without the golden ratio, on the right with
The golden ratio dates back to antiquity and is still considered particularly harmonious and aesthetic today. It describes the ratio 1 : 1.618. To calculate the smaller part of this ratio, multiply the total value by 0.618.
Example line:
1 m × 0.618 = 61.8 cm (golden ratio)
Example rectangle:
1 m height × 0.618 m width = harmonious aspect ratio in the golden ratio
Design a fleet of vehicles
It can be a challenge to develop a uniform design for different vehicle types. A design can look good on an SUV but fail on the narrow sidewall of a pickup truck. The resolution of a photo may be sufficient for a car, but too low for a van. The vehicle fleet could be expanded later, ... It is therefore worth considering working exclusively with vector graphics, as these can be scaled as required and are easy to change. It is also easy to create a uniform colour scheme with a high recognition value using coloured areas.
Tip: Open spaces for temporary advertising campaigns
Company vehicles are extremely favourable and mobile advertising spaces. So why not use them for temporary advertising campaigns? When designing your vehicle, plan free paint or glass surfaces as alternating zones right from the start!
Examples of typical occasions:
- Recruiting: Employee and trainee search ("We are hiring" / "We are looking for you").
- Sales: Discounts, seasonal promotions (Christmas, sales, Black Friday).
- Marketing: new products/services, QR codes for current online campaigns or landing pages.
- PR: company anniversaries, awards won or new certifications.
- Service: advertising free consultations or new locations.
Advantages for signmakers:
Follow-up orders through film exchange, closer customer loyalty and additional sales without costly new designs.
Advantages for customers:
Flexibility for current campaigns at low cost. The permanent branding remains protected and undamaged.
Choice of material (cheap & quick to remove)
- Polymeric PVC films (removable): Ideal for 1 to 6 months. Use polymeric instead of monomeric films to prevent the adhesive from "baking in" and to prevent paint discolouration due to UV radiation. Adhesives with low initial adhesion make removal easier.
- For customer installation: films with an air channel structure (e.g. RapidAir) are well suited as they are easier to bond.
- Caution with magnetic films: Can only be used on absolutely flat steel doors. Mandatory regular cleaning (at least every 2 weeks) and removal when driving on motorways to avoid damage to paintwork or loss.
Positioning & substrate
- Flat painted surfaces, rear window, rear side windows
- Rear window or tailgate are perfect for reading time in traffic jams or at traffic lights.
- Safety distance: The campaign should be visually demarcated so that the permanent branding remains untouched during replacement.
Combining matt and glossy foils
When combining films of the same colour, the effect varies depending on the ambient light. The brighter the light, the stronger the effect.
Advertise with a quality label

Companies that deliver quality, have satisfied customers and produce in an environmentally friendly and sustainable way should advertise these benefits proactively. Here you will find a large selection of quality seals and quality marks.
Note: Where possible, the templates are designed with editable texts so that they can be easily translated.
Tips for creating print data
Print resolution - which is optimal?
Print resolution - which is optimal?

Left: high-resolution image, centre: enlarged, right: interpolated (heavily exaggerated for illustration purposes)
There is no universal answer. An important criterion is the viewing distance. In offset printing, the ideal resolution is between 300 and 360 dpi, so that no pixels are recognisable at a distance of 30 cm. This resolution would theoretically also be ideal for vehicle design. However, as the available image material often does not allow for this and vehicles tend to be viewed from a distance of 1-2 metres, a lower resolution may be sufficient. Depending on the motif, 100-150 dpi may be sufficient, or considerably less for lorry tarpaulins. Rule of thumb: the more image details, the higher the resolution. However, logos and texts should always be razor-sharp.
Note: Although interpolated images have a higher resolution, they do not have more details and the contours are blurred.
Tip 1: Make test prints of important details and view them from the desired distance.
Tip 2: Use vector graphics instead of photos, they are always razor-sharp and have a comparatively small file size.
The relationship between scaling, effective resolution and scale
Example: You are designing a commercial vehicle using a 1:30 scale vehicle drawing in CorelDRAW or Adobe Illustrator and want to ensure that the images you place have the correct resolution.
1. Effective resolution
You place a 300 dpi image and scale it down to 10%. This increases the effective resolution tenfold from 300 to 3,000 dpi (300 x 10 = 3,000).
2. Effective resolution and scale
The effective resolution of the image is now 3,000 dpi and the vehicle drawing has a scale of 1:30. Consequently, the actual resolution of the image in digital printing is now only 100 dpi (3,000 : 30 = 100).
3. Checking the effective resolution:
- CorelDRAW: Click on the image and check the status bar at the bottom (if nothing is displayed, the image is grouped. Then ungroup it or click directly on the image in the Layers panel.
- Adobe Illustrator: Click on the image and check in the ‘Links’ window (PPI = DPI).
What is the difference between DPI and PPI?
- PPI = Pixels per Inch = pixels on screens over a distance of 2.54 cm (1 inch)
- DPI = Dots per Inch = printed ink dots over a distance of 2.54 cm (1 inch)
In practice, both terms are usually used interchangeably.
Tip:
Since version 24.2, Adobe Illustrator has included the “Large Canvas” feature, which measures 57.65 × 57.65 metres. This now allows you to design truck or bus wraps directly at a 1:1 scale. Note: When exporting as a PDF, select at least Acrobat 6 (PDF 1.5) to ensure that the dimensions are preserved correctly in the PDF.
Image processing workflow incl. colour management
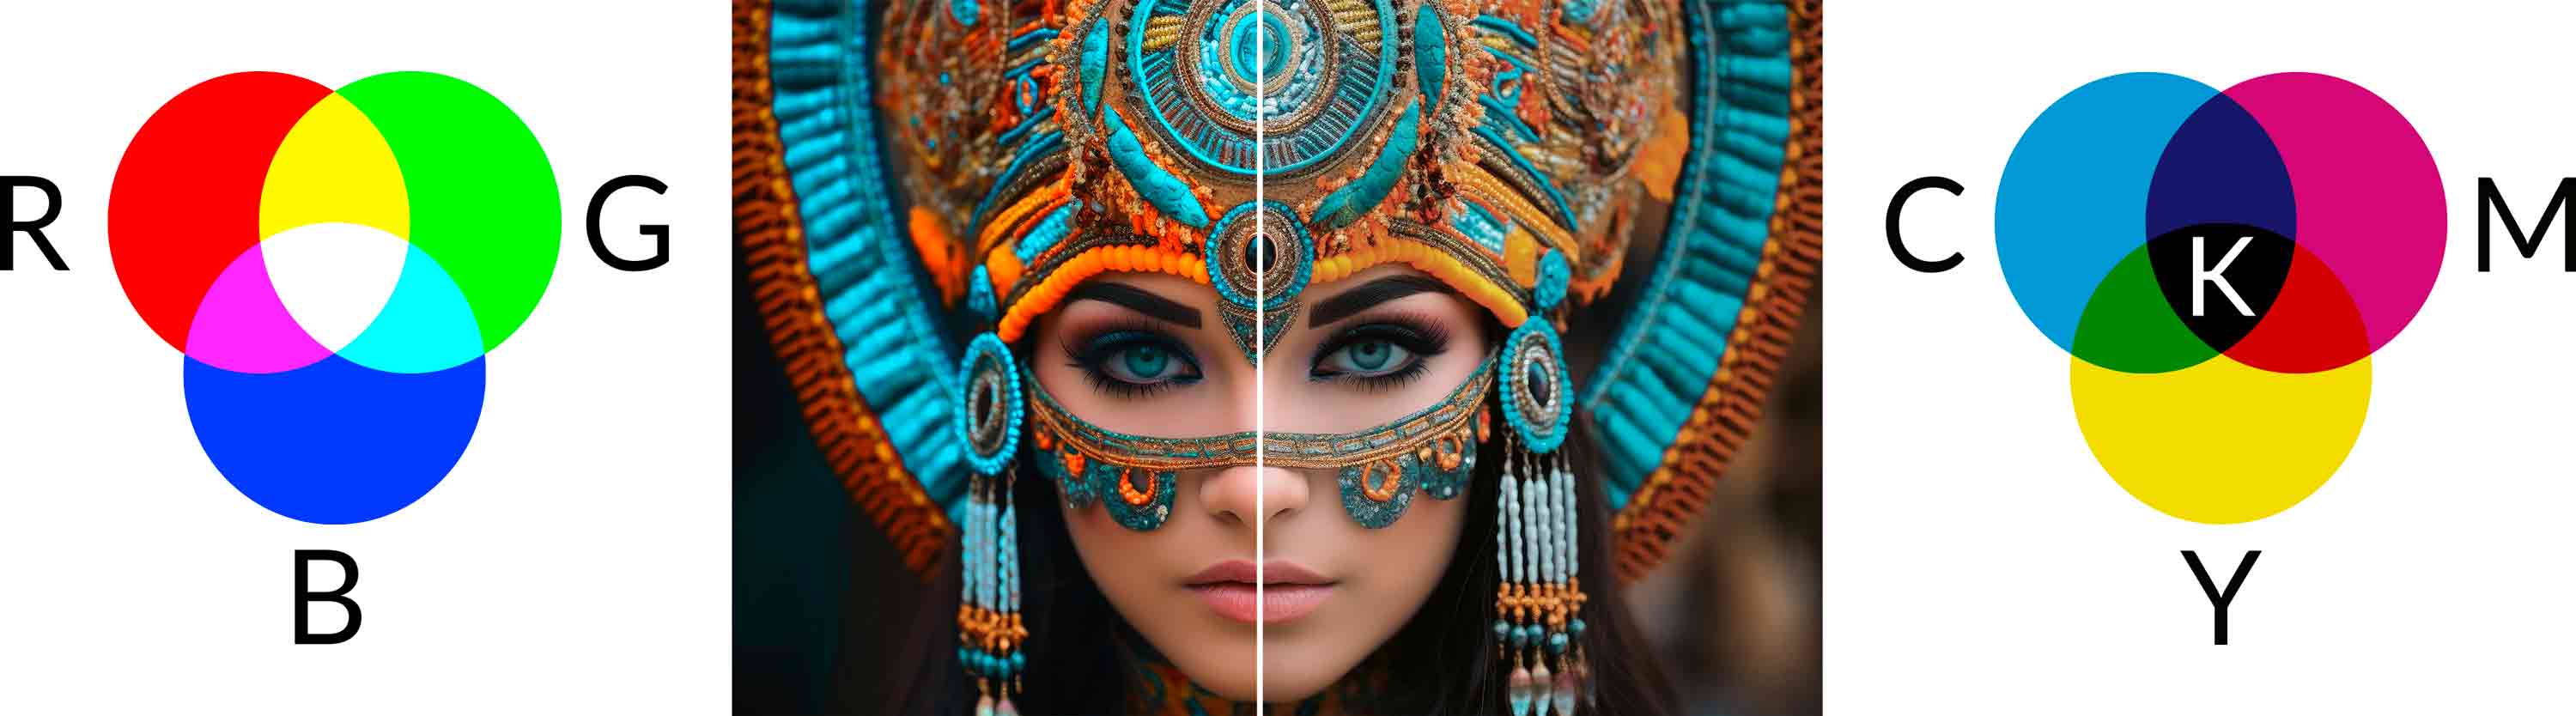
In this example, the larger RGB colour space (left) is particularly visible in the orange and cyan tones.
1. standardise source material
If image material comes from different sources, it should first be converted into a uniform colour space in order to avoid colour deviations. As the RGB colour space is larger than the CMYK colour space, it is advisable to convert all the image material into a uniform RGB profile.
Recommended RGB profiles:
- eciRGB v2 or eciRGB v3 (for the largest possible colour space, free download from eci.org)
- Adobe RGB (1998) as an alternative
Attention: only use sRGB for web and screen display, as the colour space is clearly too small for modern digital printing.
2. check and convert profiles
- Open images without automatic conversion (e.g. in Adobe Photoshop with the option "Keep embedded profile" or "Open without colour management").
- The colour profile should be assigned or converted with an active preview in order to be able to assess visible colour shifts.
3. image editing in RGB
- Retouching, colour corrections and montages should always be carried out in the uniform RGB profile.
- Save working files with all adjustment layers, masks and filters in maximum size (e.g. as PSD or TIFF).
Handling colour spaces correctly in the layout
- Free image motifs & backgrounds (focus: maximum brilliance): Leave photos and textures in RGB mode (Adobe RGB). This ensures colour control on the monitor and the RIP software gets the maximum out of the inks and transparencies when printing.
- Customer data & corporate colours (focus: maximum colour fidelity): Logos, photos or illustrations showing customers' corporate colours are an exception. You should not convert these motifs to the RGB colour space, as the colour values of the corporate colours (CMYK or special colours such as Pantone/RAL) must remain unchanged.
4 The final step for print output
Export the resulting mixed operation in the layout programme as a media-neutral PDF/X-4 to final size. The print shop's RIP software reads the RGB images in the maximum colour space and simultaneously prints the CMYK or spot colour logos exactly according to the predefined values. Manual CMYK conversion in advance is no longer necessary.
Additional tips:
Tip 1 - Save originals
Archive the unprocessed original files separately so that you can access them at any time.
Tip 2 - Compare before/after
Insert a copy of the original as the top layer in your montage. You can check changes directly by showing/hiding them.
Tip 3 - Use a folder structure
Create a standard folder structure as a copy template for all projects, e.g:
Customer / Project
1_Templates (original images, text information)
2_Montages (edits, work files)
3_Finished (print, web, social media)
Color Management
Colour management - what is it?
Colour management - what is it?
The aim of colour management is to reproduce colours as naturally and faithfully as possible. Motifs in printed matter, on wrapped vehicles or on websites should look exactly as they were photographed or created in image editing programmes. To achieve this, all devices in the entire production chain – from the camera to the monitor to the printer – must be calibrated (if possible) or profiled.
What are colour profiles?
Colour profiles work like digital labels. They provide information on how a device (e.g. camera, monitor, printer) or material (e.g. paper, digital print vinyl) displays colours. Without a correct profile, colours could look different depending on which device or medium is used.
Using colour profiles correctly
There is a simple rule for achieving the highest possible colour fidelity: Colour profiles should always be used throughout the processing of digital image data and all devices used should be calibrated.
Embed colour profiles
Modern cameras often automatically embed colour profiles in the images (often sRGB or Adobe RGB). The profile used should also be saved in the image after editing to avoid colour errors.
Assign colour profiles
If an image does not have an embedded profile, you can assign it manually in image editing software such as Adobe Photoshop. The "Adobe RGB" profile is usually suitable for RGB images if the profile used is not known.
Converting colour profiles
Images are converted from one colour profile to another. Example: An RGB photo is converted into a CMYK print file. The image to be converted should always have an embedded profile, as otherwise there is a risk of unwanted colour shifts. Skin tones are particularly tricky, as a fresh complexion can quickly turn into sunburn or a sickly pallor.
Calibration vs. profiling
Calibration
Calibration involves adjusting the hardware settings of a monitor or high-end printing system so that certain target values (e.g. colour temperature, brightness, gamma) are achieved. The aim is to achieve the most natural colour reproduction possible.
However, most commercially available monitors and printers cannot be calibrated directly. Real calibration is usually only possible with special hardware solutions, such as high-quality graphics monitors or RIP-controlled printing systems.
Profiling
Profiling involves creating an ICC profile (colour profile) that describes the actual colour representation of a device. Image processing and layout programs can use this profile to mathematically compensate for colour deviations. The device itself is not changed - the correction is made purely on the software side.
Visual colour assessment
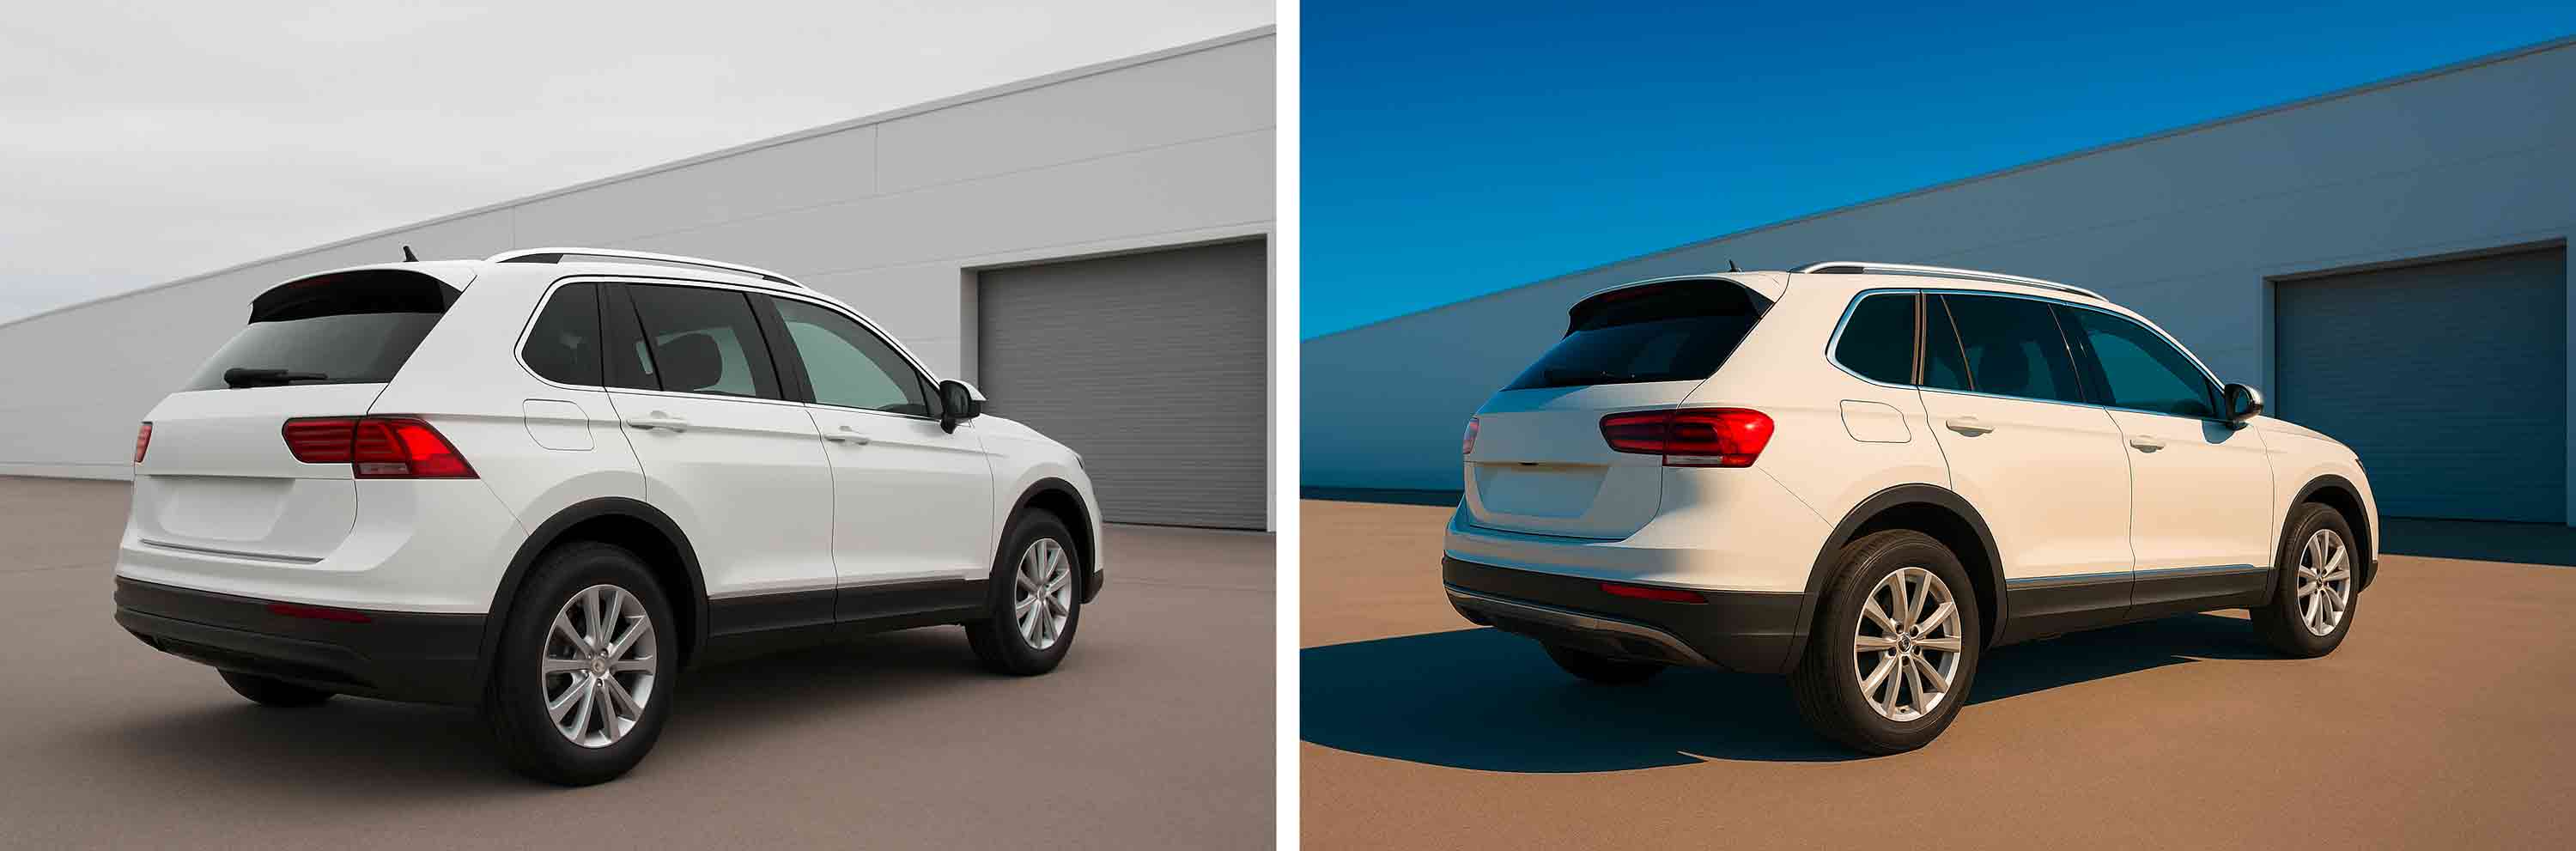
Left: overcast sky, neutral colours. Right: sunshine with yellowish highlights and bluish shadows.
Standard light for colour accuracy
The colour perception of car paints and vehicle films can vary significantly depending on the light source - for example sunlight or artificial light. Neutral lighting conditions are therefore crucial for a reliable assessment. Light sources with a colour temperature of 6,500 Kelvin, as specified in the D65 standard, are recommended. This light simulates typical daylight conditions outdoors and is therefore the standard for evaluating paints and films. Note: In the printing industry, on the other hand, standard light D50 (5,000 Kelvin) is often used as it reflects colours on paper better.
Always assess colours with laminate!
Laminate films can influence the colour impression of printed digital print vinyls. Glossy laminates make colours appear more intense and vivid as they reflect more light. Matt laminates reduce the colour intensity somewhat as less light is reflected, resulting in a softer, less radiant colour tone.
Suitable light sources
When purchasing, ensure not only a colour temperature of 6,500 K, but also sufficient brightness of at least 1,000 lux to guarantee a reliable assessment of the colours.
Assessing colours outdoors
The best way to assess colours outdoors is under an overcast, white sky. They are then displayed neutrally, as specified in the D65 standard. A blue sky is unsuitable as the colour perception is distorted (see image example above).
Special wrapping techniques
Outgassing of printed car wrapping films
Outgassing of printed car wrapping films
Allow printed car wrapping films to outgas before applying the laminate. Printing colours and inks, especially solvent inks, can release volatile organic compounds (VOCs). These penetrate the laminate layer and can lead to peeling or blistering. To avoid this, you should leave the printed film to dry loosely rolled up at room temperature in a well-ventilated area for at least 24 to 48 hours.
Make sure that the film is not exposed to direct sunlight to prevent uneven drying. During this time, solvent residues can also escape from the inks. Otherwise, these would impair the durability and finish of the laminate. Outgassing achieves better adhesion and a durable, high-quality end result.
Wet bonding
With wet bonding, a film is applied to the surface using water, which is often mixed with a little washing-up liquid or special mounting concentrate. The water acts as a lubricant and delays adhesion.
Typical areas of application
- Window labelling (e.g. frosted glass film, glass decor)
- Labelling on flat surfaces (signs, doors)
- Sensitive or difficult-to-stick substrates
- Monomer/polymer films without air channel adhesive
Advantages:
- Repositionable: The film can be easily moved and aligned.
- Bubble-free application: Water displaces air - ideal for large, flat surfaces.
- Stress-free bonding: There is no immediate adhesive contact, so there is no hassle when aligning.
- Less adhesive residue: This is particularly advantageous for temporary applications or on glass.
Disadvantages:
- Drying time required: Depending on the environment and film, 1-3 days until the adhesive is fully bonded.
- Not suitable for films with air channel adhesive, as the channels can become blocked.
- Not ideal for 3D bonding: water impedes stretchability, delays adhesion, bubbles and detachment are possible.
Conclusion:
Wet bonding is ideal for flat surfaces and smooth work, but unsuitable for modern 3D car wrapping films with air channels. It is particularly helpful for beginners and for sensitive films (e.g. decorative glass films).
Designing the sheet metal sides of commercial vehicles

If commercial vehicles are not glazed, they usually have prepared window cut-outs in the sheet metal. These edges are represented by lines in the drawings. However, you should not use them to cut the sheeting directly:
- They can be clearly defined sheet edges or rounded curves without a recognisable edge
- The corner radii can always deviate slightly
Therefore, always check the exact condition on the original vehicle or, if necessary, on the basis of photos.
Wrapping tip: If you want your design to go right up to the edges of the sheet metal, you need to cut the films larger and cut them to size directly on the vehicle, the easiest way to do this is with Knifeless Tape.
Tip: Vehicle manufacturers often launch further sheet metal or glass variants after the market launch of a new model. As the cut-outs are always the same, you can change the colour of the drawing to turn a sheet into a glass panel and vice versa.
Foil "around corners" (e.g. mudguards/engine bonnet)
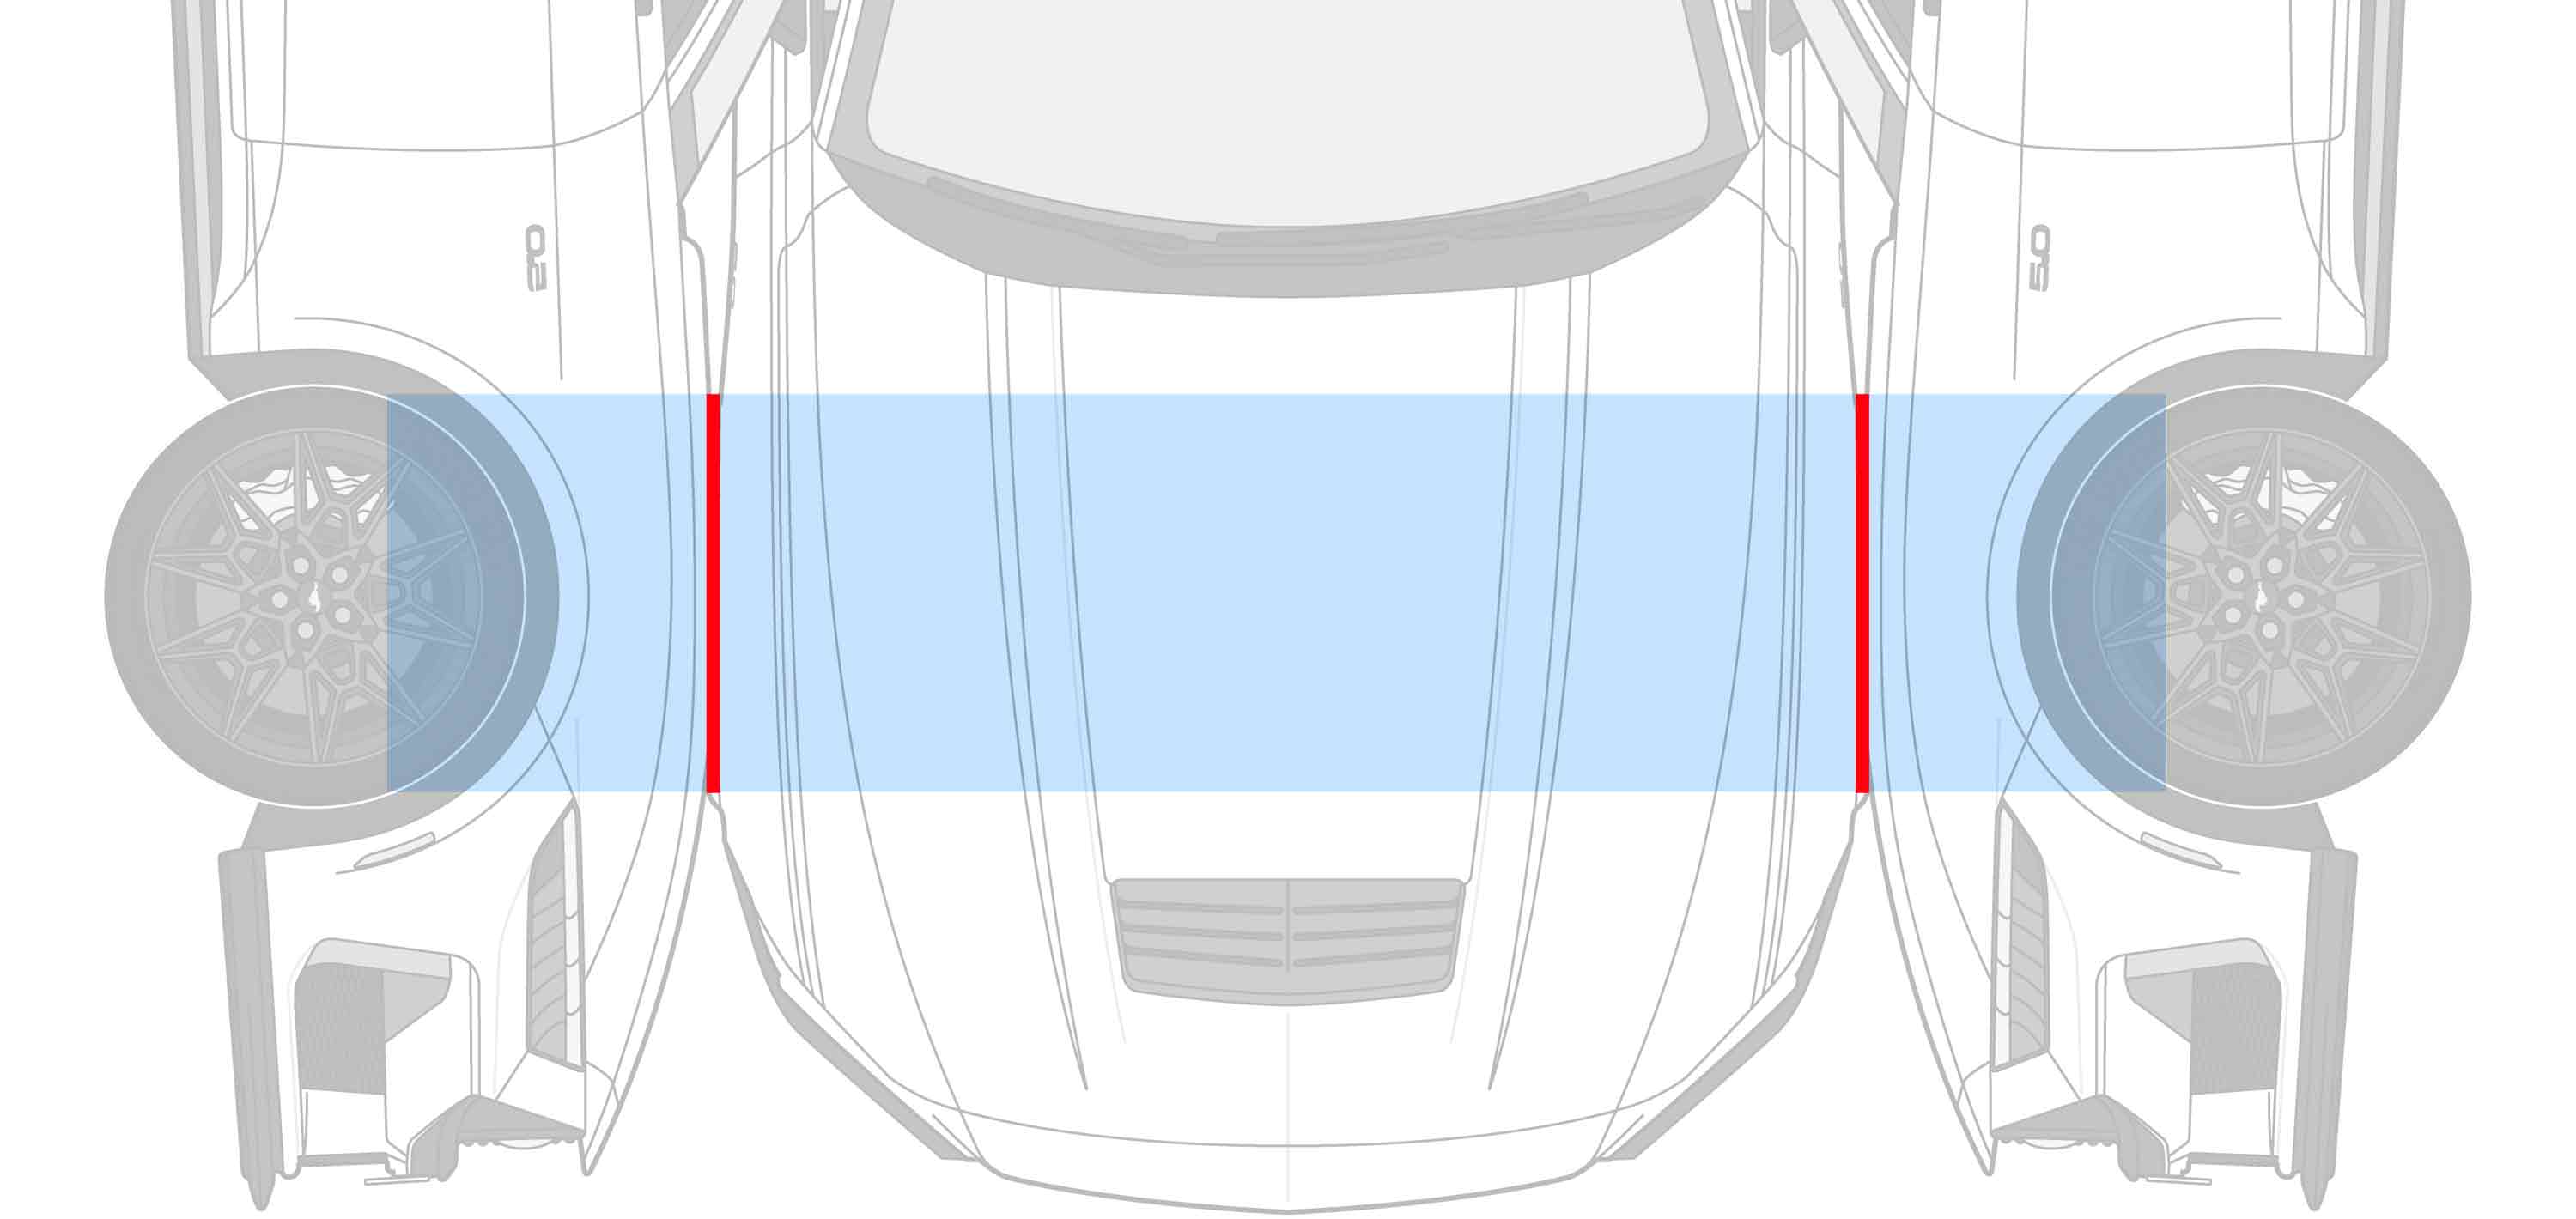
If you are planning foiling over vehicle "corners", e.g. from the wing to the bonnet or from one side of the vehicle to the rear, there is a little trick: push the corresponding views of the vehicle drawings together so that the edges at the transition areas (red lines) are as congruent as possible. You should be aware that such difficult transitions can only be roughly planned in two-dimensional drawings. In order to achieve a good fit, skill and experience are required when bonding to the vehicle. In order to have enough room to manoeuvre, the individual films should have a generous overlap area.
Design tip: When foiling strongly curved metal sheets, there will inevitably be significant stretching of the film, which can lead to unsightly distortions of the design. Therefore, diffuse motifs without sharp edges and straight lines are ideal for these areas, as they conceal distortions best. Abstract, rather small-scale decors are also a good choice here. Geometric objects and shapes as well as images of people, on the other hand, are unsuitable as they unnecessarily emphasise the distortions.
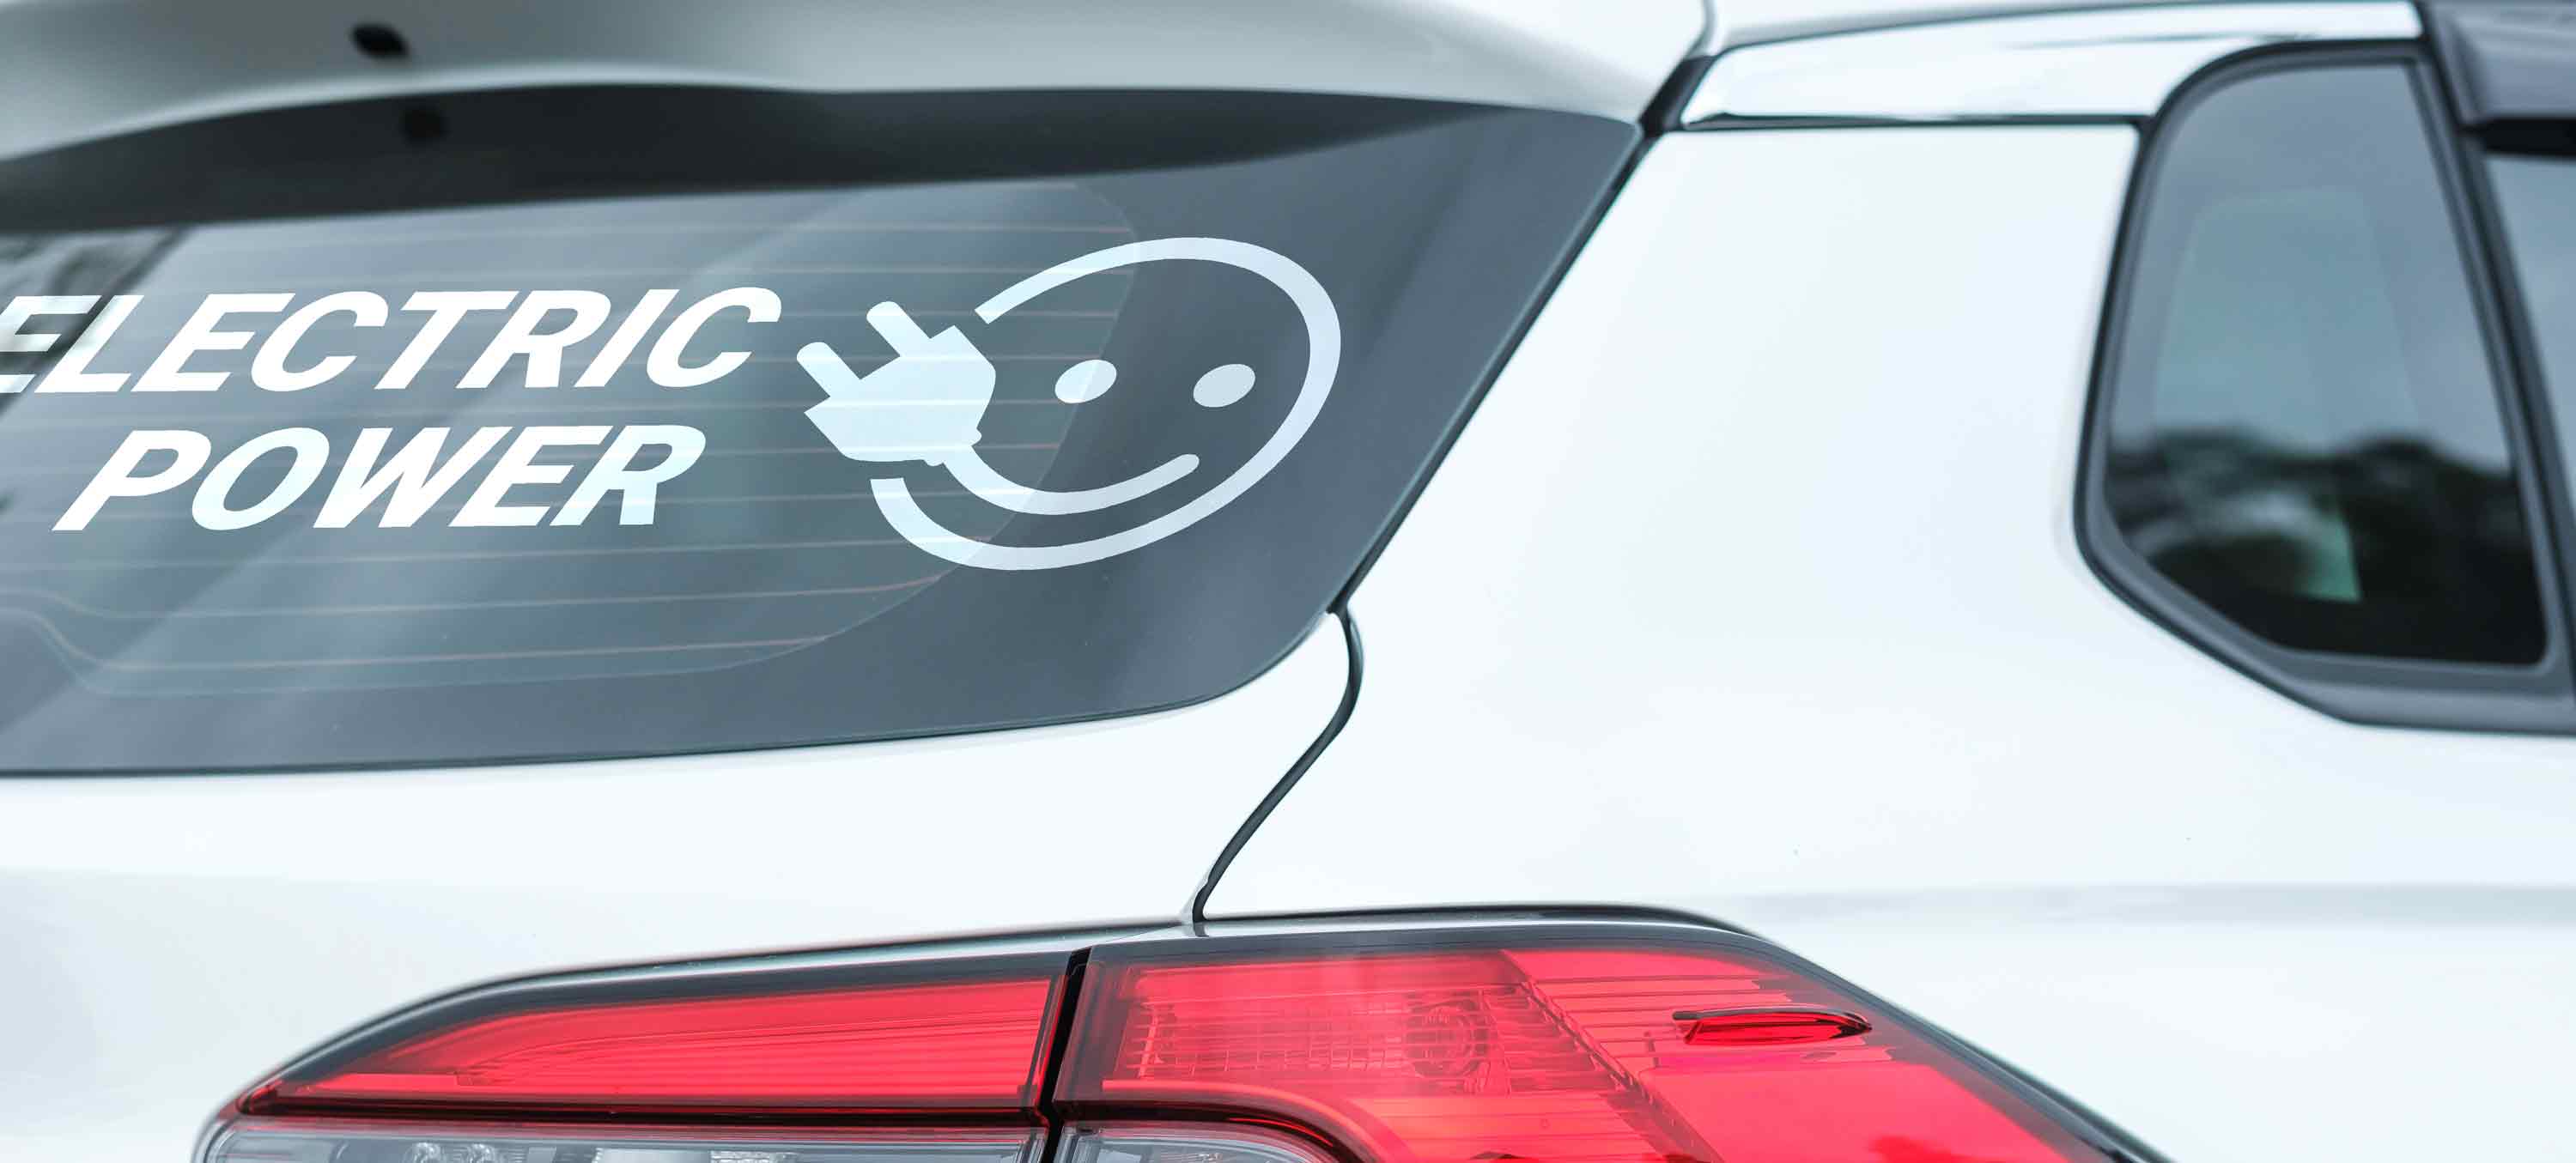
Wrapping e-vehicles – what should I bear in mind?
When wrapping electric vehicles, there are a few special features to bear in mind:
- Keep cooling air openings clear: Do not wrap any air inlets or outlets - they are important for battery cooling.
- Protect electronics: Avoid pressure, heat or the use of tools in areas with high-voltage technology (e.g. sills, charging connection).
- Check film compatibility: Test the film on special paints (e.g. Tesla, BMW i). Not every film adheres or comes off without leaving any residue.
- Avoid temperature problems: Dark, cheap films can cause heat build-up. Only use UV-stable quality film.
- Observe model-specific requirements, e.g.: In the case of the Tesla Model 3 or Audi e-tron, incorrect film application can disrupt heat distribution.
Foil rear windows
In two-dimensional drawings, rear windows can only be shown in a shortened perspective so that curvatures and corner radii are not reproduced exactly. If the film is to extend to the edge of the windscreen, the contour cut must always be made directly on the windscreen to ensure a clean result. If the original vehicle is not available for the design planning, the design should be made with large tolerances or only the centre of the windscreen should be covered.
Note: The third brake light must not be covered and test or registration plates must always remain visible. Please find out about the legal regulations applicable in your country.
Design tip: As the vehicle interior is always darker than the surroundings, white lettering on the rear window is easier to read than black lettering. The inclination of the windscreen should also be taken into account. If necessary, a strong angle of inclination can be compensated for by a vertical distortion of the design.
Be careful with dark motifs!
Dark surfaces require a lot of ink. This makes the coating more susceptible to mechanical stress, as there are more colour pigments on the surface. Scratches or matt areas are much more noticeable than on light-coloured surfaces. Grease, dust and wax residues are also immediately visible.
Tip:
- Pay particular attention to cleanliness
- Dust off and degrease the film
- Use a soft squeegee with a felt or flock attachment
- Felt or flock easily retains dirt, so clean or replace regularly
- Only apply low to medium pressure
Recommended ambient temperature for foiling
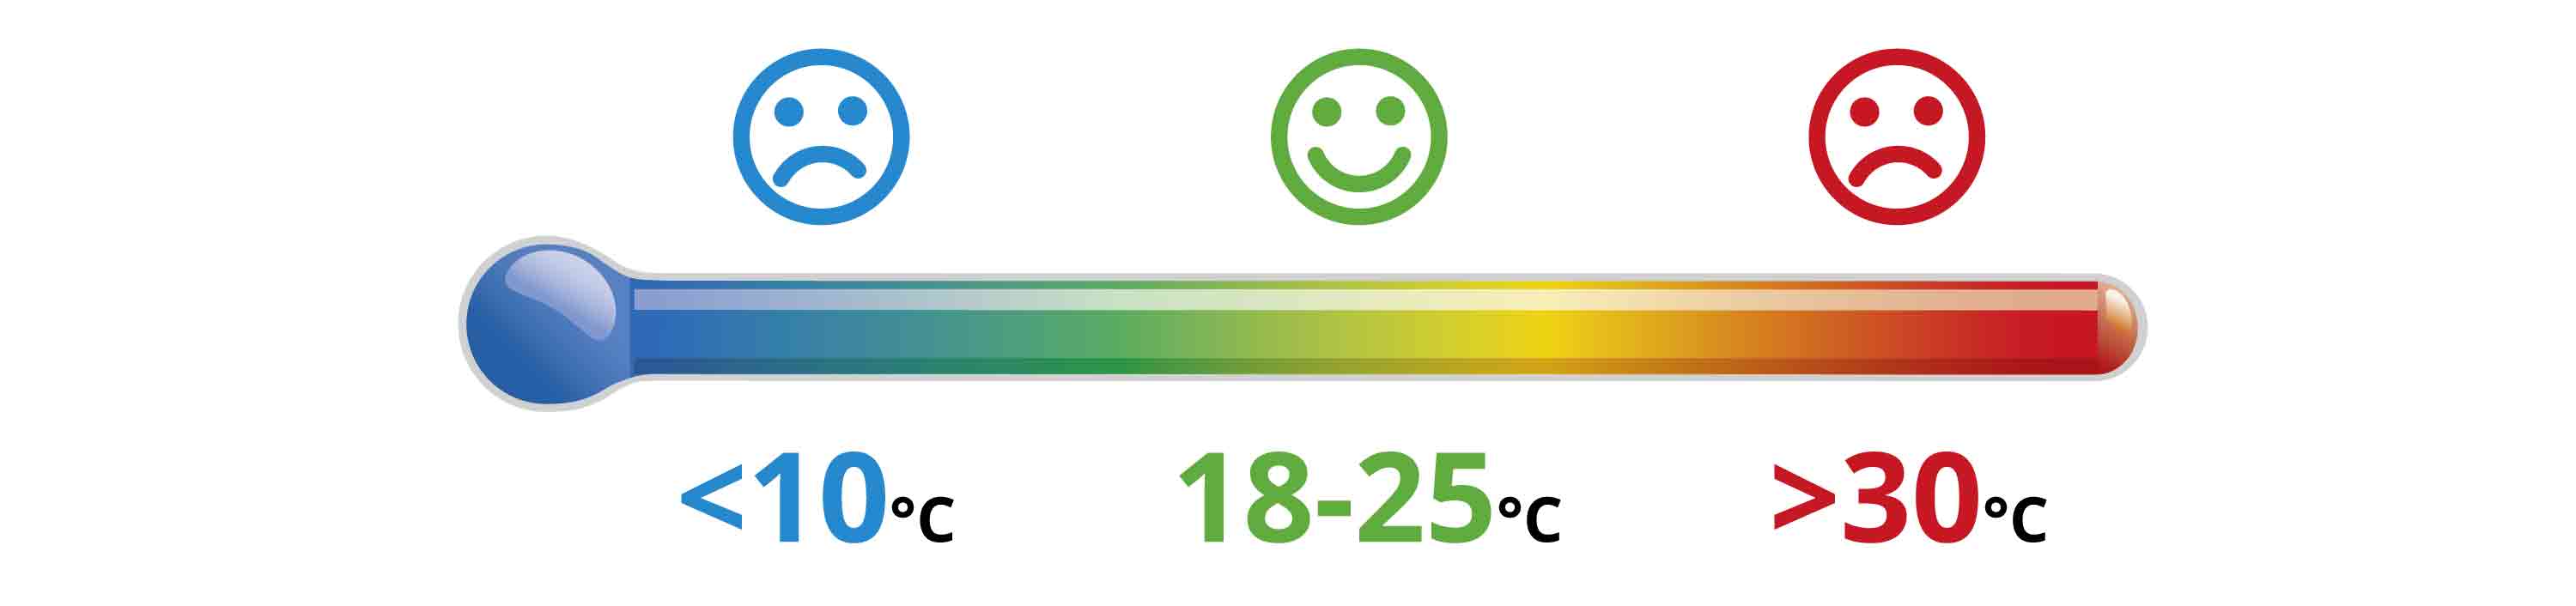
Vehicle films must be applied within a certain temperature range in order to achieve optimum results and ensure long-lasting adhesion. The recommended temperature range for wrapping is generally between 18°C and 25°C.
Temperatures that are too low (below 10°C) make processing more difficult, as the film becomes stiffer and less flexible. The adhesive is not properly activated, which impairs adhesion and can lead to the film peeling off.
If the temperature is too high (above 30°C), the film becomes too soft and can expand unevenly, which increases the risk of bubbles or wrinkling. The adhesive may adhere too strongly, making readjustment more difficult.
Sealing the edges of the film
Various manufacturers offer a transparent protective coating that is applied to the edges of the film. The aim is to increase the durability of the film by preventing the penetration of moisture, which can lead to the film peeling off. This is particularly recommended for areas of the film that are subject to heavy wear.
Cutting stone chip protection films
Vehicle parts such as front/rear skirts, spoilers, side skirts, extensions, etc. have strong curvatures. These shapes cannot be represented exactly in two-dimensional drawings and are unsuitable as cutting templates. Therefore, the stone chip protection films must be cut directly on the vehicle.
Films - properties & material knowledge
Cast/calandered films – differences
Cast/calandered films – differences
In contrast to cast films, calendered films are pressed by rollers during production. In addition, 20 to 25 per cent plasticisers are added to them. "Monomers" are short-chain, highly volatile plasticisers, while "polymers" are longer-chain plasticisers. The latter make films more dimensionally stable and durable.
Monomer calendered films
Typical applications: Interiors, exhibition stand construction, shop fitting, short-term advertising campaigns.
Advantages:
- Inexpensive
Disadvantages
- Only suitable for flat or slightly curved surfaces
- Short shelf life (up to 4 years)
- Environmental influences (heat, UV radiation, chemicals) cause the film to become brittle
- Memory effect: calendered films have a tendency to shrink and return to their original shape.
Polymer calendered films
Typical applications: Interior and exterior, vehicle lettering and part wrapping
Advantages
- Relatively inexpensive
- Similar properties to monomer calendered films, but more durable
- Polymeric plasticisers mean the film retains its shape for longer and is less prone to shrinkage
Disadvantages
- Only suitable for flat or slightly curved surfaces
- Average durability (up to 7 years)
- Environmental influences (heat, UV radiation, chemicals) cause the film to become brittle
- Memory effect: Calendered films have a tendency to shrink and return to their original shape.
Moulded films ("3D films")
Typical application: Vehicle wrapping
Advantages
- Very easy to mould and stretch, ideal for 3D bonding
- Can be removed and repositioned several times during application
- High resistance to chemical reactions and UV radiation
- Long shelf life (up to 10 years)
- Can be removed more easily than calendered films
Disadvantages
- Expensive
Tip: Production fluctuations
Always use films from the same batch for your orders to avoid colour deviations.
Tip: Pay attention to shelf life
Films should not be used beyond their service life, as the onset of decomposition makes them difficult to remove and can damage the paintwork. In horizontal areas such as the roof, films wear out more quickly due to direct sunlight.
Digital printing/solid colour films – differences
Digital print vinyls
Advantages:
- Unlimited design possibilities: Ideal for complex patterns, colour gradients, photos and individual graphics.
- Exact colour fidelity: Important for logos and branding.
- Large-scale design: Perfect for complete foiling.
Disadvantages:
- Printed films are limited in the colour spectrum due to CMYK printing technology.
- Loss of quality up close: Possible pixelation with poor print quality.
- Less gloss: Print films often appear duller.
Plotter/full-tone films
Advantages:
- Rich, vibrant colours
- Razor-sharp contours, ideal for text
- Durability: Less UV influence, therefore longer lasting than printed films.
- Wide range of textured and effect films available
Disadvantages:
- Limited design options: Solid colours only, no complex patterns or gradients.
- More time-consuming for designs with multiple colours, as several layers are required.
Conclusion:
Printed films are ideal for creative and complex designs, cut colour films are better for simple, long-lasting designs with bold colours.
Tip: Combine!
Use digital print vinyls for complex designs and solid colour vinyls for text, single-colour areas and, if possible, logos.
TPU films - the new generation in car wrapping
TPU films (thermoplastic polyurethane) are currently revolutionising the vehicle wrapping market. They combine the advantages of classic colour wrapping with the protective properties of a paint protection film (PPF).
While PVC films are mainly used for design changes and colour changes, TPU films offer additional protection against stone chips, scratches and swirls in the car wash. The material is significantly more elastic and resistant than classic PVC films and absorbs impact energy better.
Another advantage of many TPU films is the self-healing surface: fine scratches virtually disappear by themselves when exposed to heat, such as sunlight or warm water.
TPU also offers advantages in terms of durability and appearance. Modern TPU films are very UV-stable and hardly yellow at all. Depending on the area of application, they can last up to ten years. At the same time, the smooth surface ensures a particularly high-quality, lacquer-like appearance.
TPU vs. PVC - A direct comparison
| Characteristic | TPU film | PVC film |
| Main function | Colour change and paint protection | Colour change / design |
| Durability | approx. 6-10 years | approx. 3-5 years |
| Stone chip protection | very high | low |
| Self-healing | yes | no |
| UV resistance | very high | medium |
| Surface finish | smooth, lacquer-like | partially orange peel |
| cost | higher | more favourable |
Conclusion:
TPU films close the gap between classic car wrapping and paint protection film. For vehicle wrappers, this opens up the possibility of offering design and surface protection in a single solution.
Note:
TPU films are not only available as finished coloured films, but also as printable versions. Compared to classic PVC printing films, however, their processing is technically more demanding and significantly more cost-intensive.
Only use films from the same batch!
The upper and lower film come from different batches. The effect is slightly exaggerated for illustration purposes.
Slight colour deviations can occur during the production of films. For this reason, films from different batches should never be mixed. The alignment of the film should also always be uniform, as the colour of some film types can vary slightly depending on the viewing angle. A non-uniform alignment can result in certain areas of the vehicle appearing differently coloured, even though the same film has been used.
Attachment parts – observe material and surface properties
Add-on parts such as bumpers, bumper guards or door handles are sometimes difficult or impossible to film. It is therefore advisable to find out about the condition beforehand:
- In car colour or unpainted?
- Plastic or metal (sheet metal)?
- Smooth or rough surface?
Tip: Before final application, adhesion should be tested on test pieces. This ensures that the film is compatible with the substrate. This is particularly important for new or unfamiliar films in order to recognise potential problems at an early stage.
Adhesive for vehicle films
Depending on the application, different types of adhesive are used for car wrapping films:
Acrylic adhesives (with smooth adhesive application)
- High-quality car wrapping films usually rely on solvent-based systems
- offer a maximum adhesive surface and therefore high final adhesion
- Ideal for highly curved areas, such as exterior mirrors
- High resistance to UV radiation and weather influences
Structural adhesives (e.g. AirFree, Bubble Free, Comply, Easy Apply)
- Structural adhesives are acrylate adhesives with integrated air channels
- enable bubble-free bonding, as trapped air can escape when pressed on
- Ideal for large, smooth surfaces
- Easy handling and precise positioning
- Less suitable for structured or uneven surfaces
- Not suitable for wet bonding
Adhesive properties
- Tack: initial adhesion - describes the ability of the adhesive to adhere immediately after contact
- Adhesion: final adhesion - describes the final bond to the surface after curing
- Cohesion: internal cohesion of the adhesive - a high cohesion value prevents the adhesive from tearing or peeling under load
Tack
| (N/25mm) | Practical significance | Assessment for car wrapping |
| 5-10 | Low initial adhesion - film still "glides" | Very easy to reposition, ideal for wrapping large surfaces |
| 10-15 | Moderate hold, but can still be moved | Good for curved or complex surfaces |
| 15-20 | Sticks quite strongly on first contact | Can only be repositioned to a limited extent |
| > 20 | Immediately very strong adhesion | Hardly repositionable - rather for permanent applications such as labelling |
Adhesion
| (N/25mm) | Practical significance | Assessment for car wrapping |
| 5-10 | Low final adhesion | May not be sufficient for permanent outdoor use |
| 10-15 | Medium adhesion | Good for temporary wrapping (e.g. advertising campaigns) |
| 15-25 | High final adhesion | Ideal for long-term vehicle wrapping |
| > 25 | Extremely high adhesion | More common with safety/industrial films |
(N/25mm) = The force required to remove a 25 mm wide strip of film, 1 Newton = 100 g.
Environmentally friendly vehicle films
With the increasing demand for ecological solutions, environmentally friendly vehicle films are becoming more and more important. They are made of PVC-free materials (usually polyolefins or polyurethanes), are recyclable and, depending on the product, do not contain any harmful plasticisers or chlorine compounds. Some use solvent-free adhesives. They are approx. 20-30% more expensive than PVC films, but their durability is comparable.
Environmentally friendly films may require more care and experience during processing, as they react differently to fluctuations in temperature and humidity than PVC films. This can increase the processing time somewhat.
Film colours – selection and care
- Matt black: Elegant, but scratch-sensitive, requires more care as small scratches are clearly visible.
- Silver: Less sensitive to scratches. The shiny surface conceals damage well and is easy to clean.
- Red: Can fade more quickly due to UV radiation. Sun protection and regular care are required.
- Blue: Offers a good balance between visibility and maintenance. Light blue colours are less susceptible to dirt and scratches.
Note the colour of the vehicle paint!
Light film colours can allow the dark car paint underneath to show through. This can result in undesirable colour nuances. This effect mainly occurs in highly curved areas, as the film is stretched more and is therefore thinner. Conversely, a dark film on light-coloured paintwork can also be problematic, as the paint can show through at the edges of the film in the beads.
When calculating, it must be taken into account that vehicles with dark paint colours are easier to wrap than light-coloured vehicles if the design is to extend to or over the edges of the sheet metal. This is because with light paint colours, the film must be applied further around the edges of the sheet metal to avoid unsightly paint flashes. With dark paint colours, it is easier to conceal small film defects, as dark shadows always appear at the edges of the bodywork anyway.
Store films correctly
Correct storage is crucial for maintaining the adhesive properties and surface quality of films in the long term and maximising their shelf life.
Basic rules for storage
- Never store films folded or compressed
- Do not stack on top of each other if there is no support
- Leave labels visible on the outside for quick identification
Room climate
- Store films in a cool, dry and dark place
- Ideal: 18-22 °C and 40-60 % humidity
- Avoid direct sunlight and temperature fluctuations
Suitable storage methods:
Original packaging for new/unused rolls
- Protects against dust, light and moisture
- Ideal for longer storage or shipping
Mandrel racks for opened or frequently used castors
- Ideal for everyday workshop use
- Quick access for frequent roll changes
- No deformation due to pressure on the roll
Special film boxes (horizontal, with support mould)
- Good for flexible and safe storage
- Rolls remain stable and protected.
- Ideal for smaller warehouses or mobile applications
Spray films ("car dipping") Advantages and disadvantages
Spray films are most frequently used for wheel rims - for visual reasons or for protection. They are particularly suitable for jagged and filigree surfaces such as radiator grilles or emblems, which can often only be wrapped with great effort or not at all. They are also used as stone chip protection or for full wrapping. However, it should be borne in mind that removing the film from all cracks and corners can be very time-consuming. Basically, the vehicles must be prepared just as carefully as with classic wrapping. In addition, everything that is not to be wrapped must be masked off. In order to achieve an even result and avoid running noses, several even layers must be sprayed on.
Follow-up & maintenance
Care and cleaning of foiled vehicles
Care and cleaning of foiled vehicles
Cleaning:
- After wrapping, wait at least one week, preferably 14 days, before cleaning for the first time.
- Rinse off dirt with water as soon as possible.
- Soak stubborn dirt (e.g. bird droppings or tree resin) in hot soapy water for a few minutes.
- Preferably wash by hand; use soft, non-abrasive utensils (soft microfibre cloths and sponges).
- Use mild, pH-neutral cleaning agents, no aggressive solvents or harsh cleaning agents.
- Follow the film manufacturer's instructions before using high-pressure cleaners.
- Do not point the high-pressure cleaner at the edges of the film.
- Washing systems with nylon brushes can damage the film. Washing systems with textile cloths are gentler.
- Avoid water stains: Remove water with a silicone squeegee and wipe with a clean microfibre cloth.
Drying:
- Prefer air drying
- Use microfibre cloths for drying
Avoid harmful environmental influences:
- Avoid parking in direct sunlight if possible
- Avoid extreme temperatures
- Do not park under resinous trees
Care, protection:
- Park in a garage overnight if possible, as rain and dew can contain acidic contaminants. If necessary, a carport or fabric cover will suffice.
- Check the film regularly for wear and tear, have minor damage repaired immediately
- Wax or similar coatings: Follow the manufacturer's recommendations
Care tips for wrapped vehicles as a leaflet for your customers
Provide your customers with a notepad (digital and/or analogue). This is a service for your customers and helps to avoid possible complaints and expensive rework. Here is a suggested text:
Care tips for wrapped vehicles
Thank you for your trust in our work. To ensure that you can enjoy your wrapping for a long time, please observe the following instructions:
1. first wash:
Wait at least 14 days (preferably three weeks) before washing your car.
2nd cleaning:
Wash your car every fortnight or by hand if it is very dirty. Use pH-neutral shampoo and soft microfibre cloths, but no aggressive brushes.
3. stain removal:
If stains are caused by bird droppings, resin or insects, soak the stain immediately in hot soapy water, wipe off gently and rinse. Treat stubborn stains with a 2:1 solution of isopropanol and water. Only work in the shade.
4. high-pressure cleaner (if necessary):
Maximum pressure: 80 bar, maximum water temperature: 60 °C, wide spray angle (~40°), distance to the film: at least 30 cm, hold the spray lance vertically. Make absolutely sure not to spray below the edge of the film with the spray lance.
5. protection:
It is best to park in the shade or in the garage. Seal the film regularly with a film care product.
6. care product recommendations (optional):
- product 1, application note
- product 2, application note
- product 3, application note
7. inspection:
Please make an appointment with us for a free inspection approximately three weeks after wrapping to ensure a long service life.
8. damage & durability:
If there is visible damage to the film, please contact us immediately so that we can repair it. Please also note the maximum service life of the film. This is three to ten years, depending on quality and use. This will help you avoid problems with the film or paintwork at a later date.
We will be happy to answer any questions you may have. If you are satisfied, please recommend us to others.
(Your company logo, contact details, ...)
Remove bird droppings and other stubborn stains immediately
Cover the stain with a handkerchief or similar and moisten it with hot soapy water (e.g. pH-neutral shampoo). Leave to soak for 5-10 minutes. Carefully lift off the cloth together with the dirt. Then wipe the stain with a soft microfibre cloth in gentle, circular movements. Then rinse the area thoroughly with clean water and dry.
For stubborn stains (e.g. dried faeces, insects or tar), use a solution of two parts isopropanol (70 %) and one part water. Work it in gently and rinse it off immediately.
Work in the shade and not in direct sunlight, as the surface temperature could otherwise be too high, which could damage the film.
Inspection appointment after foiling
Offer your customers a free inspection appointment around three weeks after wrapping. This way, bubbles, edge peeling or other problems can be detected and rectified at an early stage. Your customers will be pleased with this free service and you can avoid complaints and expensive repairs.
Film change: When is the right time?
Pay attention to the manufacturer's instructions regarding the durability of the film, which must be replaced as soon as there is visible wear, discolouration or peeling. This is because removing the old film or if dirt and moisture get under the film can damage the car paintwork. Look out for the following signs of wear and tear:
- Peeling or detachment of the film
- Visible discolouration or yellowing
- Cracks or damage
- Irregular surface structure (wrinkles, bubbles)
- Damage due to stone chips or scratches
Caution in the event of accidents: The paintwork can be weakened in the affected area and, in the worst case, flake off when the film is removed. Therefore: Ask about any damage before removing the film.
Legal notes (StVZO)
Documentation of professional vehicle wrapping
Documentation of professional vehicle wrapping
This list is intended as food for thought in order to be prepared in the event of legal disputes. It does not claim to be complete or correct.
1. Before wrapping
- Document the condition of the vehicle:
- Photos from all sides, detailed photos of paint damage, stone chips, scratches.
- Record (checklist) in which existing damage is entered.
- Customer signs the record.
- Record material details:
- Film brand used, series, colour code
- Production/batch number of the roll (if available)
- Manufacturer's data sheet (e.g. shelf life, processing temperature)
2. During the wrapping process
- Record the work steps photographically (optional, but very helpful):
- Cleaning/preparation (degreasing, removal of add-on parts)
- Application to critical areas (e.g. beading, edges, bumpers)
- Application according to manufacturer's instructions (temperature, post-heating)
- Checklist for processing:
- Edge and joint sealant applied?
- Note any primers or additional materials used
3. After wrapping
- Document the finished work:
- Photos of the complete vehicle, close-ups of critical areas
- Acceptance report: Customer checks the vehicle and confirms that it is in perfect condition
- Handover of documents:
- Care instructions for the customer (e.g. no high-pressure lance directly on edges, no aggressive chemicals)
- Reference to warranty and durability conditions of the film manufacturer
4. Storage & proof
- Save all documents digitally (photos, protocols, invoices, film certificates)
- Archive signed handover and acceptance protocols
- In the event of a dispute, it can be proven that ...
- the vehicle was handed over without any new damage
- work was carried out professionally in accordance with the manufacturer's specifications
- the materials used are documented
Attention: Prohibited & problematic films
The following information relates to Germany and is provided without guarantee. Similar principles usually apply in neighbouring countries (glare, deception, operational safety).
Prohibited films/effects
- Full-surface chrome foils: strong glare effect → violation of operational safety.
- Extremely matt, light-absorbing black films (e.g. Vantablack effects): very low visibility → safety risk.
- Neon, fluorescent or self-illuminating films: are considered unauthorised lighting equipment → not permitted.
- Designs that imitate emergency vehicles (police, fire brigade, rescue service ...): Risk of deception → may be criminally relevant.
- Films without general type approval → Type approval may be cancelled.
What is permitted?
- Normal plain, metallic and matt films, as long as they do not cause extreme reflection or glare.
- Partial foils, as long as they do not dazzle or imitate emergency vehicles.
Rights & obligations
- If there is a significant change to the base colour, a colour change must always be registered.
- In case of uncertainty: Have the testing organisation check whether the wrapping is permitted.
Consequences of offences
- Fines
- Points for traffic offences
- Immobilisation for dangerous or dazzling effects
- Cancellation of the operating licence for non-approved films / missing general operating licence
Recommended action
- Clarify admissibility beforehand with the relevant test centre
- Inform vehicle insurance company if vehicle appearance is significantly changed.
- Check and carry general operating licence/material approval.
- After wrapping, have the vehicle registration certificate updated if the base colour has been noticeably changed.
Check trade mark rights to avoid liability!
Protect yourself against warnings, claims for damages and other legal consequences.
Typical case study:
A customer brings logos or protected third-party signs for vehicle wrapping. These may also be seals of quality that may only be awarded by certain organisations. After the wrapping, the rights holder issues a warning for unauthorised use. In this case, not only the customer is liable, but you as the wrapper may also be liable.
Recommendation:
Do not wrap any brand logos or protected signs without obtaining written confirmation from the customer that they are authorised to use them (e.g. as a licensee, brand owner or rights holder). If in doubt, you should refuse the order or seek legal advice.
Wrapping windscreens and front side windows

The following conditions must be met in the UK when wrapping windscreens and front side windows: The light transmission must be at least 75% for the windscreen and at least 70% for the side windows. Specifications without guarantee!
Wrapping headlights, indicators and rear lights
In most countries, the wrapping of headlights, indicators and tail lights is either prohibited or subject to strict regulations. It is therefore strongly recommended that you find out about the applicable legislation in advance.
Anti-glare strips for the windscreen
A narrow strip at the top is permissible. Information without guarantee. Please enquire about the exact legal requirements for your country.
Vehicle wrapping & car insurance
Wrapping types:
- Protective films (e.g. stone chip protection): Often part of fully comprehensive insurance.
- Full wrapping: Insurers often check whether the added value is taken into account.
- Decorative (partial) wrapping: May be less insured or not insured at all, depending on the policy.
Types of insurance:
- Fully comprehensive: Generally covers professionally applied wrapping.
- Partial cover: Usually only protects against certain types of damage. Damage to the film is generally not covered.
Special risks:
Dazzling effects (e.g. with chrome foils) can favour accidents and lead to legal disputes.
Recommendations for action:
- Check your insurance policy: Clarify whether the wrapping is covered by the insurance.
- Clarify insurance details: Enquire with your insurer about special regulations.
- Documentation: This is how you can prove that the wrapping was done professionally.
Please note:
The information relates to Germany; different regulations may apply in other countries. In many countries, the wrapping must be reported to the insurance company.